
This post may contain affiliate links. Please see our disclosure policy.


Why You’ll Love Gluten-Free Nutter Butter Cookies
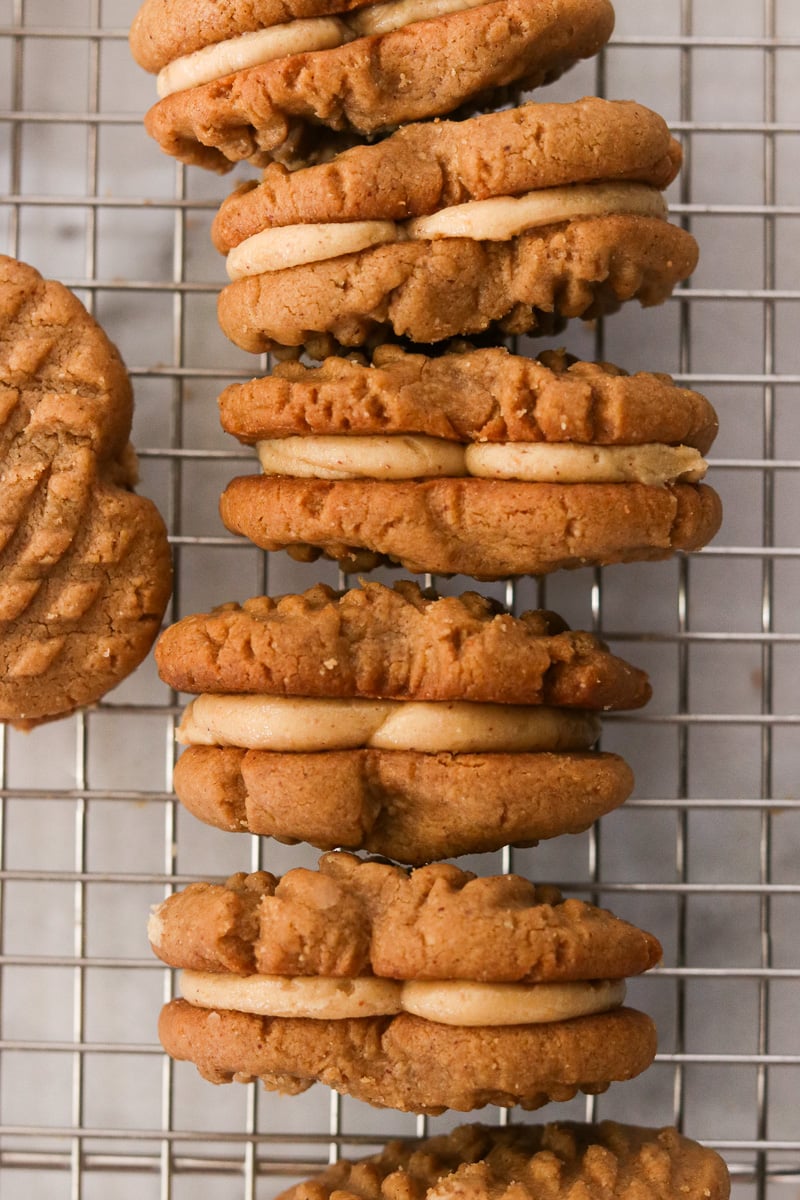
Little Debbie nutter butters were one of my favorite childhood treats, and it was so fun to recreate a gluten-free version with simple ingredients that turned out soft, chewy, and even more delicious! The cookies bake up soft and tender with lightly crisp edges, and the creamy peanut butter filling adds that familiar sweet, salty center, similar to the peanut butter flavor you get in these no-bake chocolate peanut butter bars.
What makes these gluten-free nutter butter cookies especially simple is that they’re completely flourless. You don’t need a gluten-free flour blend or any specialty ingredients, and the dough comes together quickly with pantry staples. The shaping is simple to do by hand, and once chilled, the cookies hold together beautifully for an easy, nostalgic treat you can make anytime.
If you love sandwich-style cookies like these, my gluten-free Milano cookies are another must try, with a smooth chocolate filling tucked between delicate cookies.
Ingredients You’ll Need
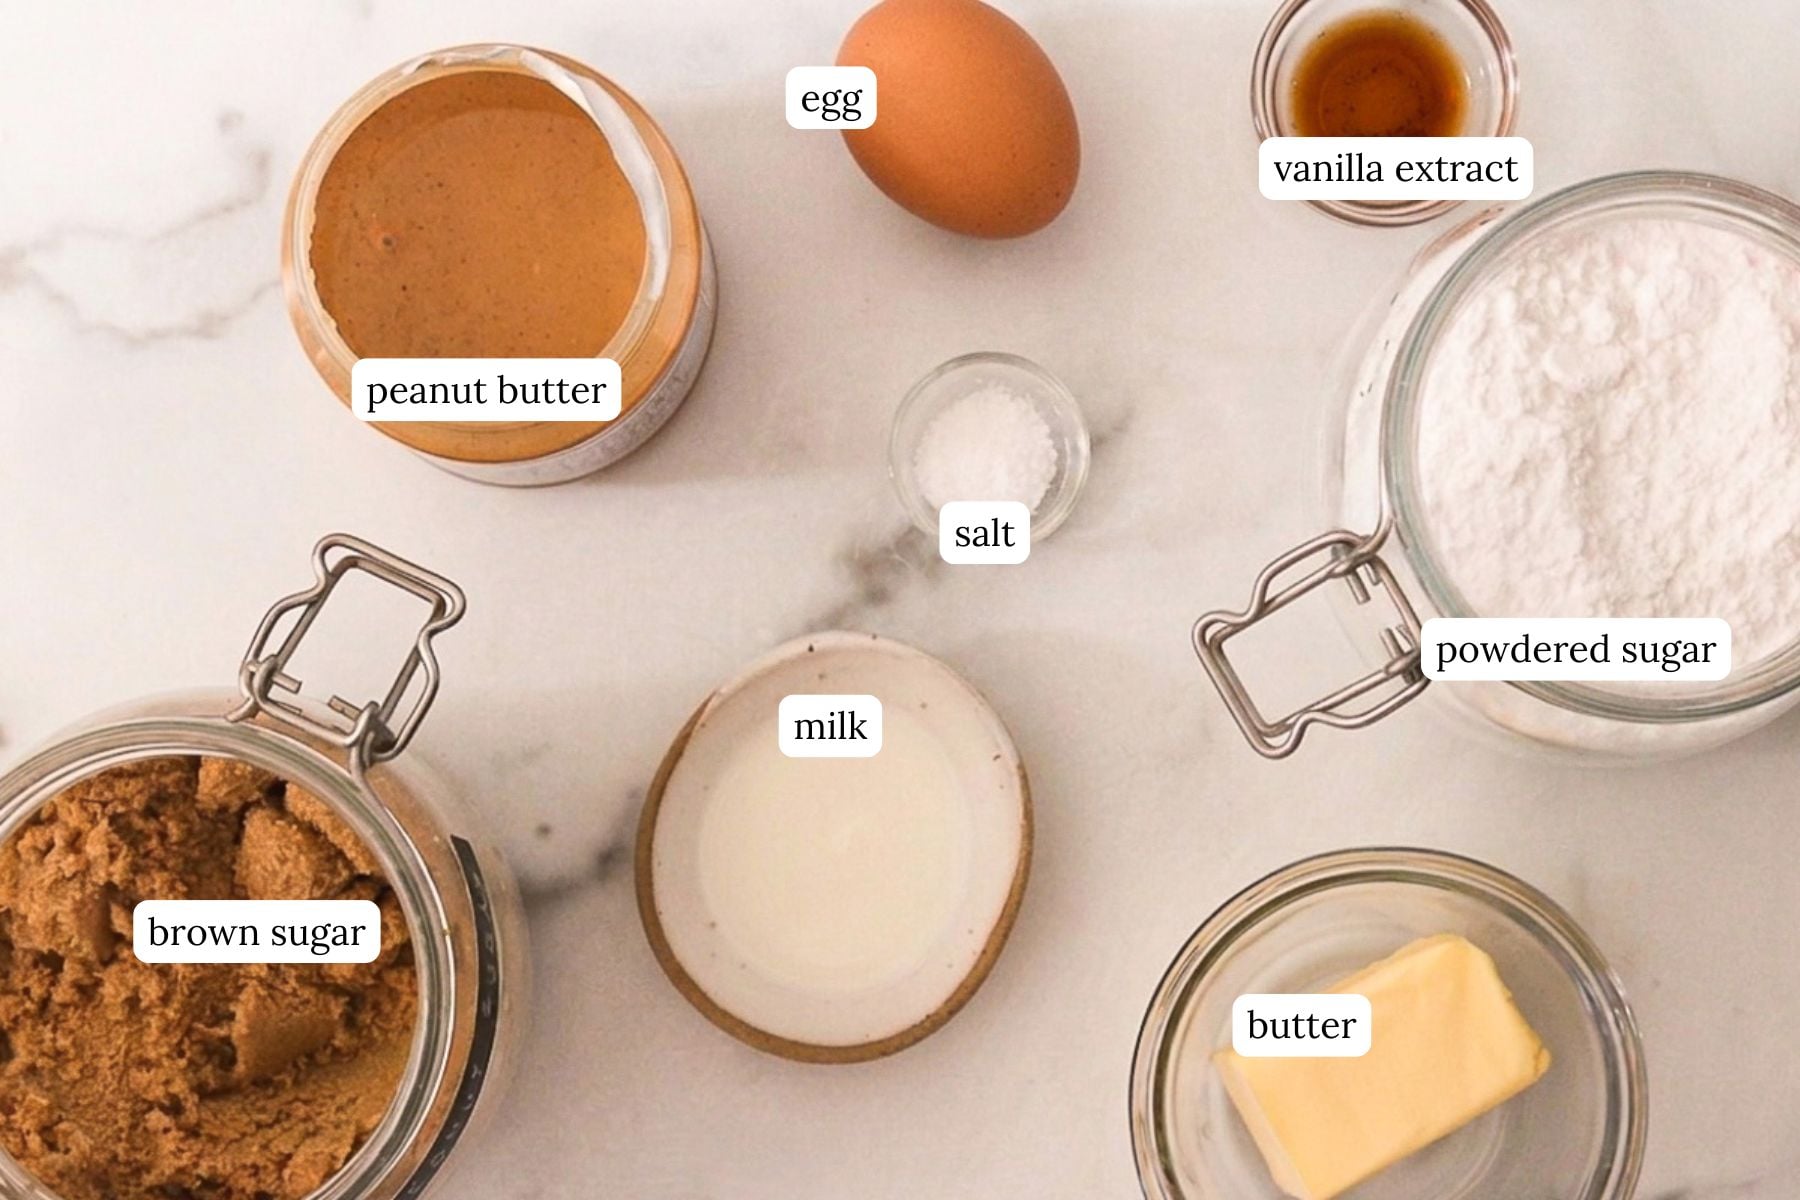
Cookies
- Creamy peanut butter: The base of the dough. It gives structure and that rich peanut flavor, so a smooth, well-stirred peanut butter works best.
- Brown sugar: Keeps the cookies soft and adds a slight caramel note.
- Egg: Helps bind the dough since there’s no flour.
- Vanilla extract: Adds warmth and rounds out the flavor.
- Sea salt: Balances the sweetness and sharpens the peanut butter flavor.
Creamy Filling
- Butter: Creates a smooth, spreadable base for the filling.
- Creamy peanut butter: Adds that familiar nutter butter center.
- Powdered sugar: Sweetens and thickens the filling so it holds between the cookies.
- Milk of your choice: Adjusts the texture so the filling is easy to spread without being runny.
Recipe Substitutions
- Creamy peanut butter really makes a difference in this gluten free nutter butter recipe. Crunchy peanut butter can make the dough harder to shape and the filling less smooth.
- Any milk works for the filling. Add it gradually so you can control the consistency. If needed, you can use dairy-free butter and milk to make a dairy-free version.
If you’re looking for a completely nut-free dessert option, these cassava flour chocolate chip cookies are a great one to have on hand.
How to Make Homemade Nutter Butters

Step 1: Preheat oven to 350 degrees F, and line a baking sheet with parchment paper. Combine all ingredients for the cookies in a large bowl and whisk until evenly combined. The dough should look thick and slightly sticky but easy to scoop.
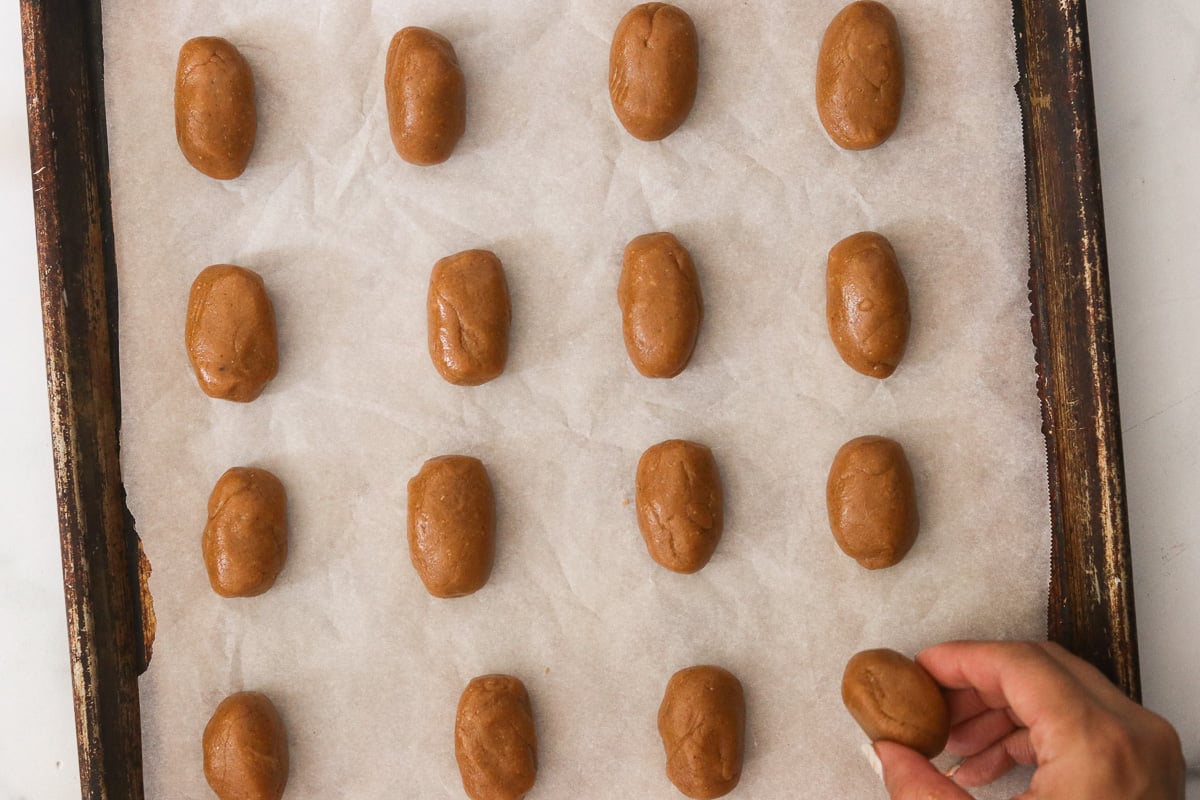
Step 2: Scoop 1 tablespoon of the dough and roll into a log with your hands. Place on the prepared baking sheet 2 inches apart. You should have about 24 logs.
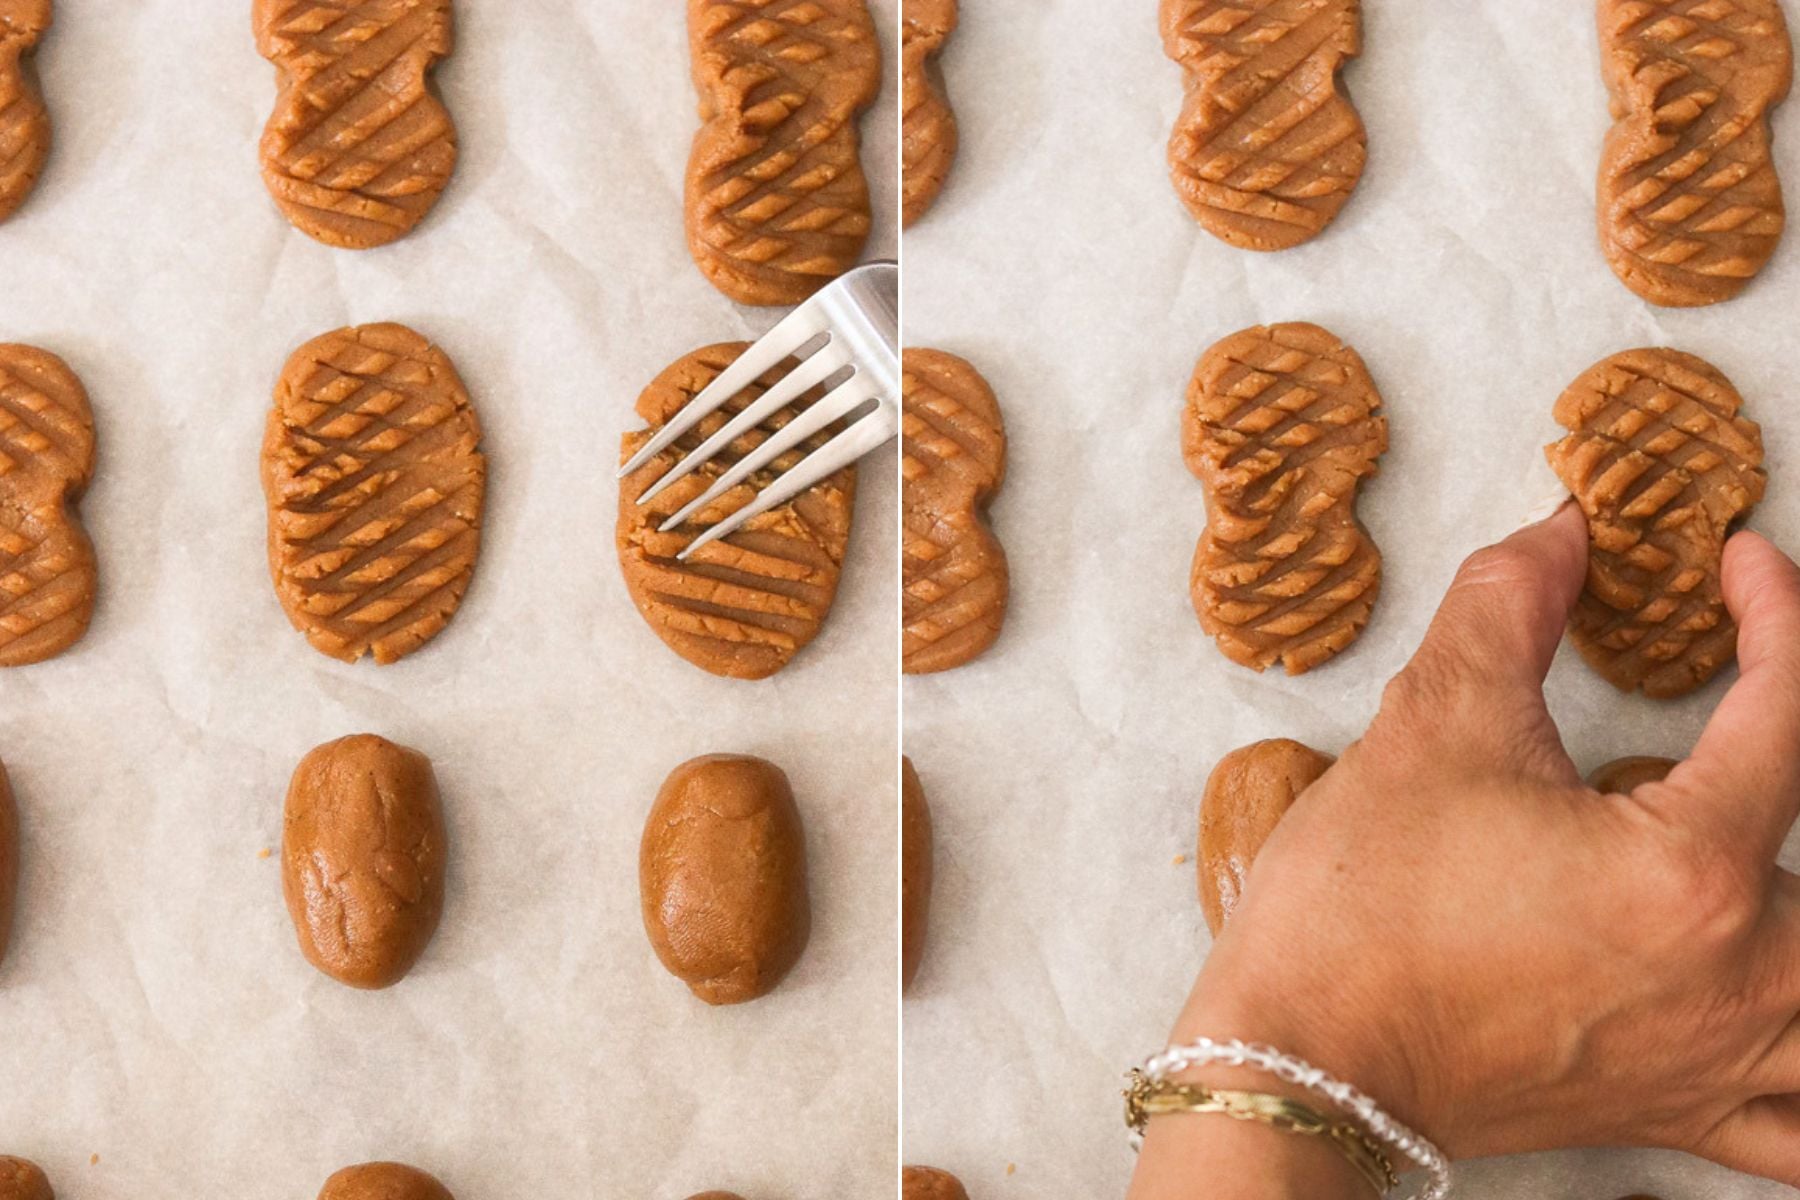
Step 3: Flatten each log with a fork, making a crisscross shape, then pinch the middle to form a peanut shape.
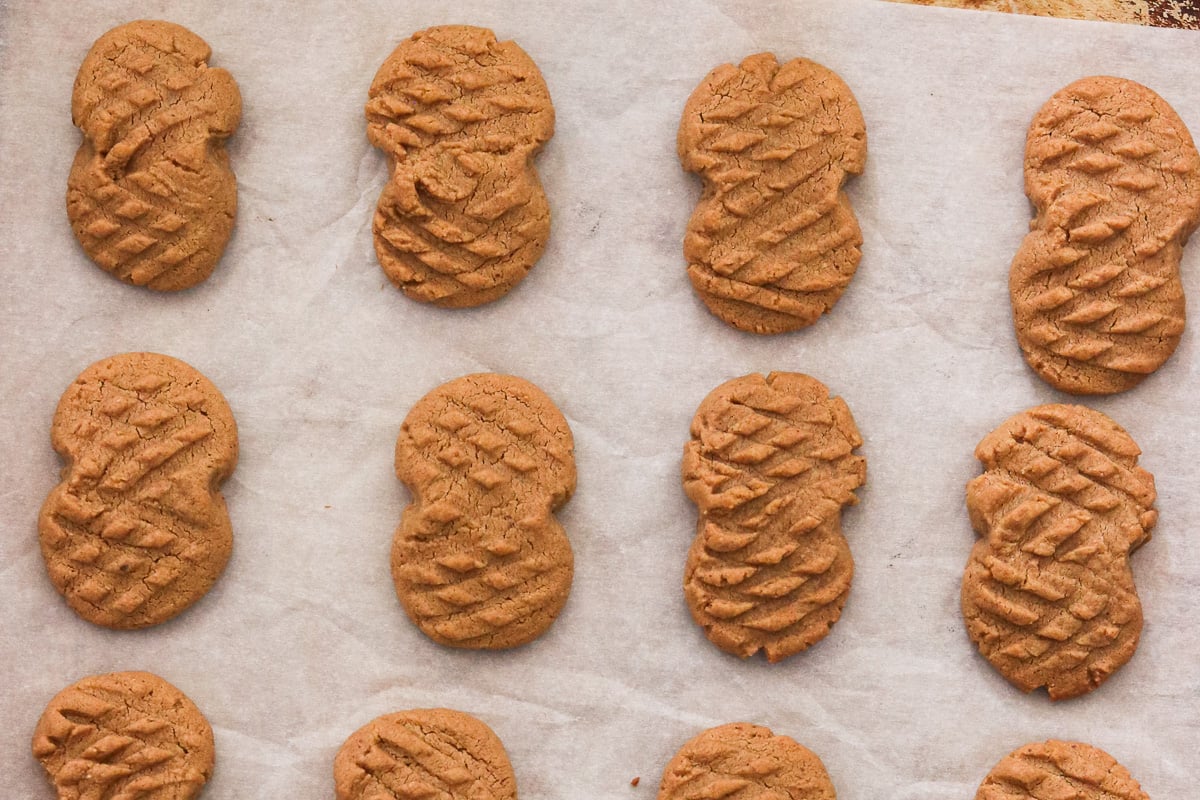
Step 4: Bake in the preheated oven for 10 minutes, until the edges look set and slightly darker. Let them cool on the baking sheet for a few minutes before transferring to a wire rack to cool completely.
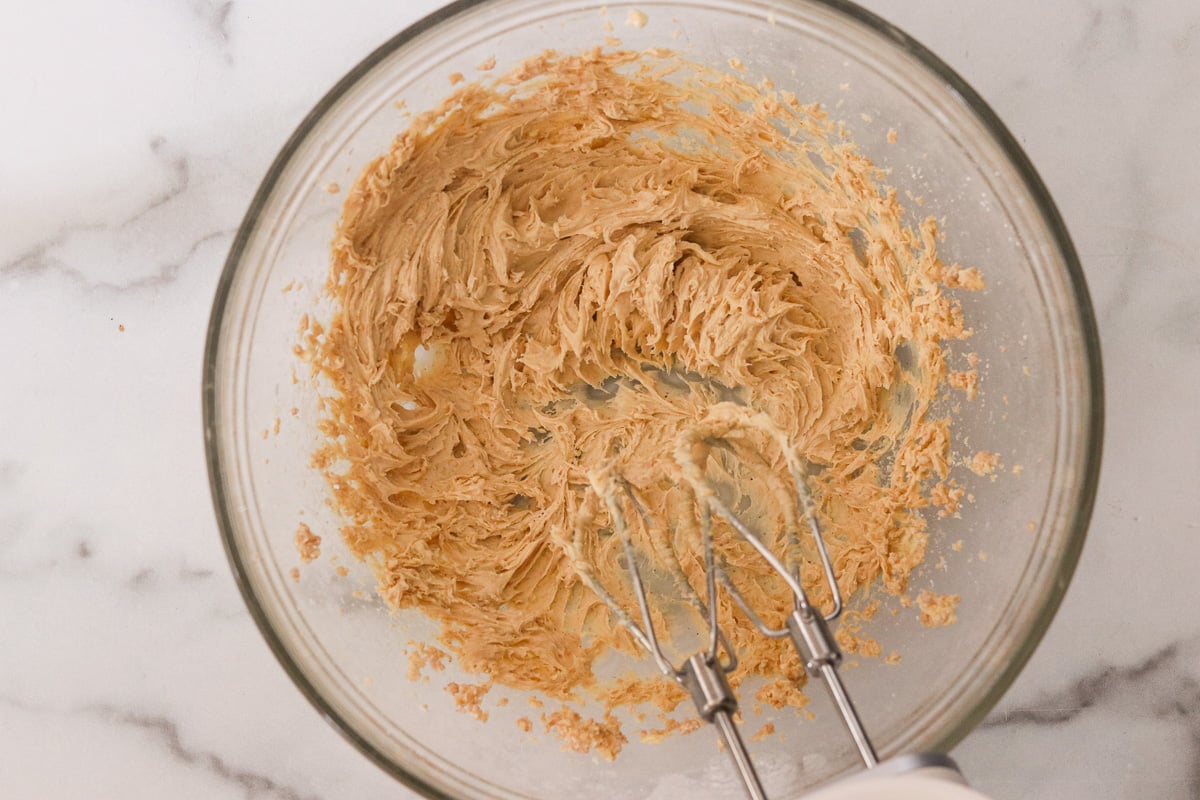
Step 5: Using a hand mixer or a stand mixer, cream together butter, peanut butter, and powdered sugar. Add milk and mix again until it becomes smooth and spreadable. Add more milk, a small splash at a time if needed.
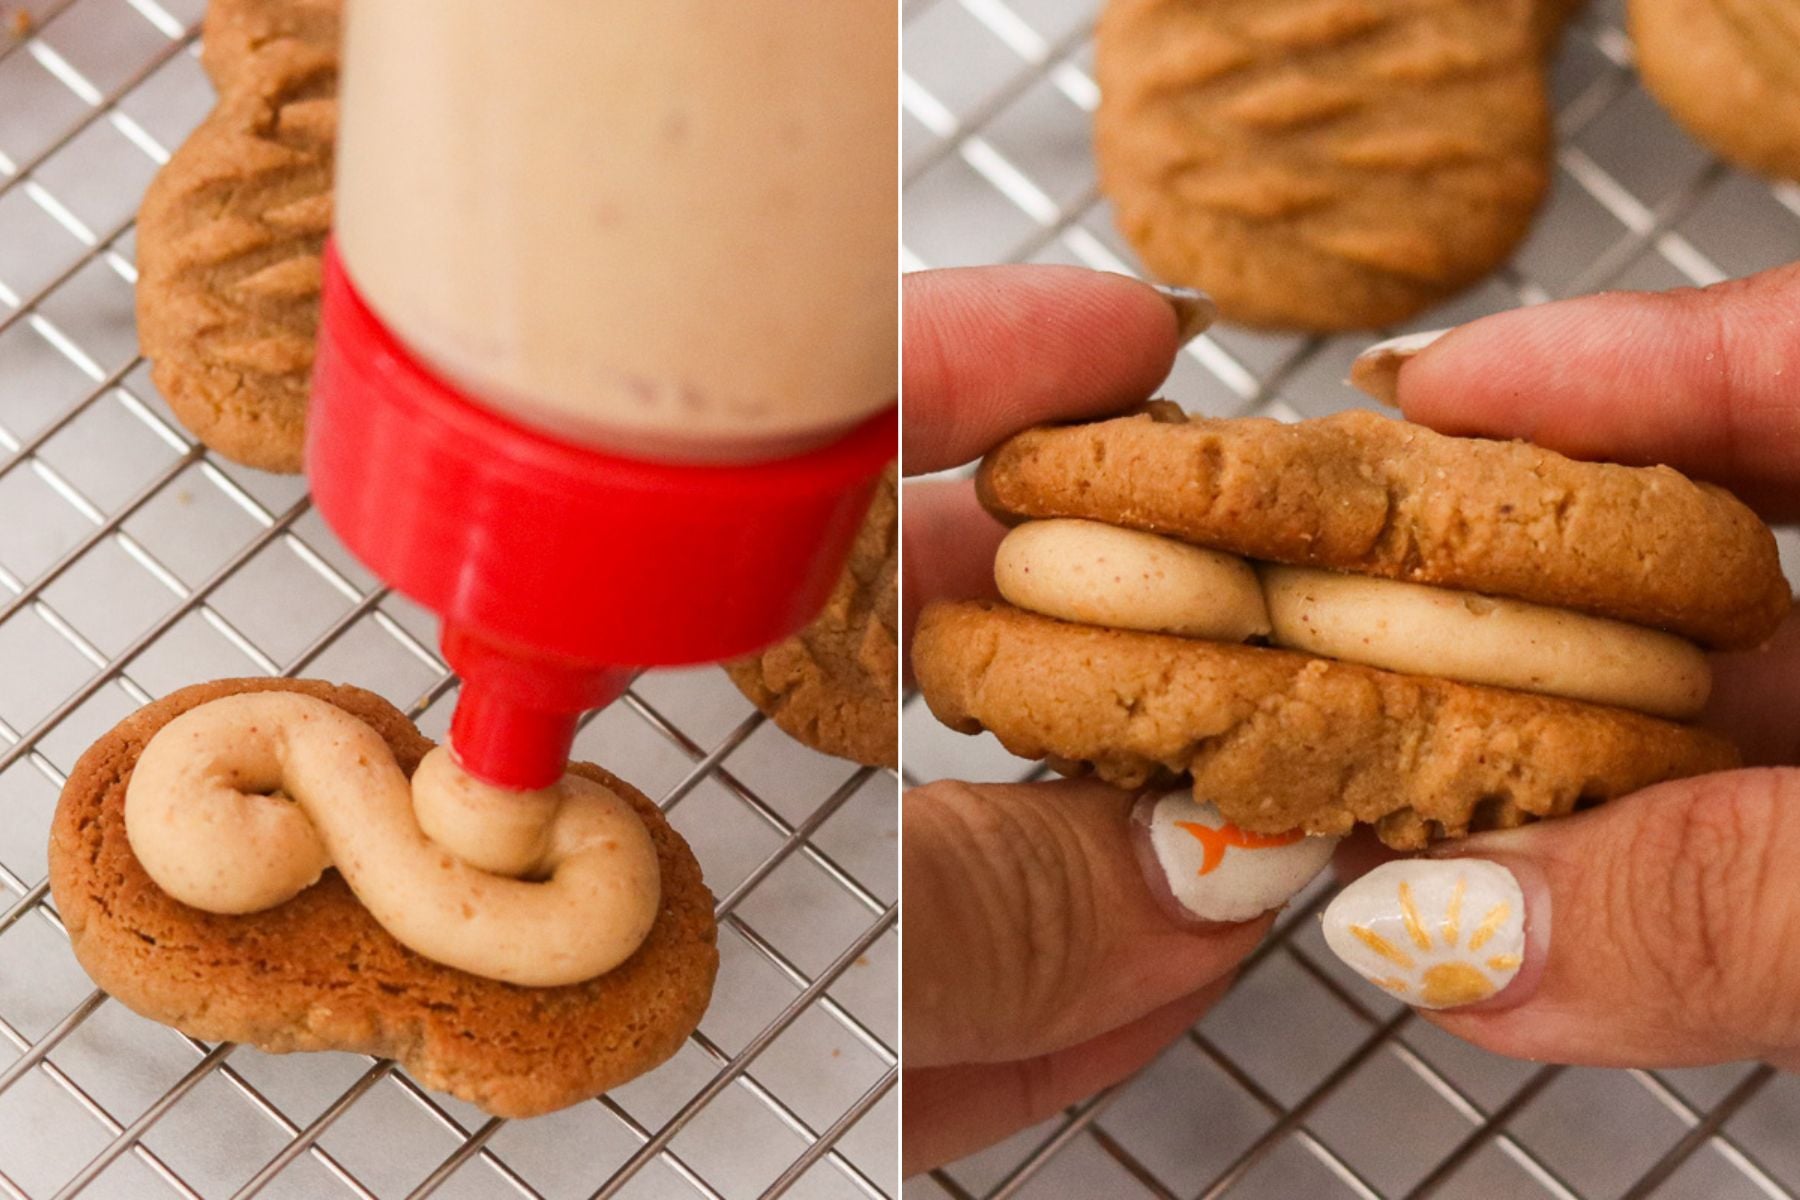
Step 6: Add about 2-3 teaspoons of the filling to the bottom side of one cookie, then top with another cookie. You can use a squeeze bottle, piping bag, or spoon. Repeat with the rest of the cookies. Enjoy!
Expert Tips
- I recommend using no-stir peanut butter for the best results. However, if your peanut butter is very oily or separated, stir it well before measuring so the dough holds together.
- Watch the edges, not the center. These cookies are done when the edges look set. The centers will still be soft but firm up as they cool.
- Let the cookies cool fully before filling. While warm, they are delicate and can break when pressed together.
- If your filling feels too thick, add milk slowly until it spreads easily. If it becomes too soft, a short chill in the fridge will firm it back up.
Storage & Make-Ahead Tips
- Store the cookies in an airtight container in the fridge for up to 1 week. The filling firms up slightly when chilled, which helps them hold together.
- You can also freeze them for up to 3 months. Thaw in the fridge or at room temperature until softened.
If you love peanut butter desserts, this chocolate peanut butter ice cream and my peanut butter and jelly cookies are two more of my favorites.
Recipe FAQs
Traditional store-bought Nutter Butters are not gluten free. This homemade version skips flour entirely, so it’s a great alternative if you’re avoiding gluten.
Yes, but it should be thick and well mixed. Very runny peanut butter can make the dough too soft and the filling harder to control.
Flourless peanut butter cookies are naturally softer. Letting them cool completely helps them firm up so they can be filled without breaking.
Yes. They freeze well and hold their texture once thawed.
More Gluten-Free Cookie Recipes


If you make this gluten-free nutter butters recipe, please leave me a star rating and comment below! I love to hear your thoughts and feedback. Follow me on social media Instagram, Facebook, and Pinterest for even more delicious recipes!
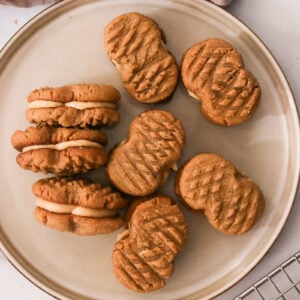
Easy Gluten-Free Nutter Butters
Video
Ingredients
Cookies
- 1 cup creamy peanut butter
- 1/2 cup brown sugar
- 1 egg
- 1 tsp vanilla extract
- 1/2 tsp sea salt
Filling
- 1/4 cup butter at room temperature
- 1/4 cup creamy peanut butter
- 3/4 cup powdered sugar
- 1 tbsp milk of your choice plus more if needed
Instructions
- Preheat oven to 350, and line a baking sheet with parchment paper. Combine all ingredients for the cookies in a large bowl and whisk until combined evenly.1 cup creamy peanut butter, 1/2 cup brown sugar, 1 egg, 1 tsp vanilla extract, 1/2 tsp sea salt
- Scoop 1 tbsp of the dough and roll into a log with your hands. Place on the prepare baking sheet 2 inches apart. You should have about 24 logs.
- Flatten each log with fork making a criss cross shape, then pinch the middle to make the shape of a peanut.
- Bake in the preheated oven for 10 minutes until the edges are firm. Cool on the baking sheet for a few minutes before gently removing to a wire rack to cool completely.
- Using a hand mixer or a stand mixer, cream together butter, peanut butter, and powdered sugar. Add milk and mix again until it's a creamy and spreadable consistency. You can add a little bit more milk, if needed.1/4 cup butter, 1/4 cup creamy peanut butter, 3/4 cup powdered sugar, 1 tbsp milk of your choice
- Add about 2-3 tsp of the filling to the bottom side of one cookie, and then top with another cookie (I use a squeeze bottle with a large opening, but you can also just spoon the filling or use a piping bag). Repeat with the rest of the cookies. Enjoy!
Notes
- I recommend using no-stir peanut butter for the best results. However, if your peanut butter is very oily or separated, stir it well before measuring so the dough holds together.
- Watch the edges, not the center. These cookies are done when the edges look set. The centers will still be soft but firm up as they cool.
- Let the cookies cool fully before filling. While warm, they are delicate and can break when pressed together.
- If your filling feels too thick, add milk slowly until it spreads easily. If it becomes too soft, a short chill in the fridge will firm it back up.
- Store the cookies in an airtight container in the fridge for up to 1 week. The filling firms up slightly when chilled, which helps them hold together.
- You can also freeze them for up to 3 months. Thaw in the fridge or at room temperature until softened.
I used sugar free substitute like Lakanto Monkfruit brown sugar, swerve powdered sugar and no sugar added peanut butter and they were amazing! Highly recommend and great gluten-free alternative
Super addictive cookies! Love how quick the recipe comes together and cheap it is to make. Every time I make it, I wish I doubled the recipe.
These were SO good and got STELLAR reviews from my non-gf family members, there were barely enough left for me (the gf person). The batch didn’t last 30 minutes in our house.
That’s the best compliment. Thanks so much for leaving a review!
There isn’t any amounts listed for how much of the ingredients you need. All i see is what you need and combine…. no tbsp or tsp no nothin. Glad you wasted your time writing a whole blog post to a useless recipe
If you kept reading you can see all the amounts written out in the recipe box. You can also just tap on “jump to recipe” at the top of the page. Hope that helps!
How rude and insensitive this message was. I just couldn’t believe it. Negative comments are not productive especially when the author of said comment showed her ignorance. Like Jean said, all you had to do was either scroll down the blog and find the complete recipe with measurements or click on Jump to Recipe. I have done this for all of Jean’s recipes plus countless other recipes using the same format to publish them.
Is there a sugar free option? Or a diabetic friendly option?
I haven’t tried with sugar free sweeteners but it might work with granulated sweeteners like erythritol or allulose!
Hi Tegan, I used Lakanto brown sugar substitute, swerve powdered sugar substitute and no sugar added creamy peanut. Taste so good! Try it out.
These look amazing! I am also wondering, as I have a friend who’s gf and vegan, if these could be made without egg (or maybe with egg substitute), and vegan butter?
Cheers and thanks!
If you want to make it eggless, I think you have to add some flour to the mix. I haven’t tried it yet so I’m not sure of the quantity.
You have the macros as a per serving, but you don’t give the amount per serving. Is it one cookie per serving or two cookies or what can you please update that or let me know
So sorry about that! Yes it’s one cookie and there are 12 cookies total.
How many cookies in a serving? Thanks
1!