This post may contain affiliate links. Please see our disclosure policy.

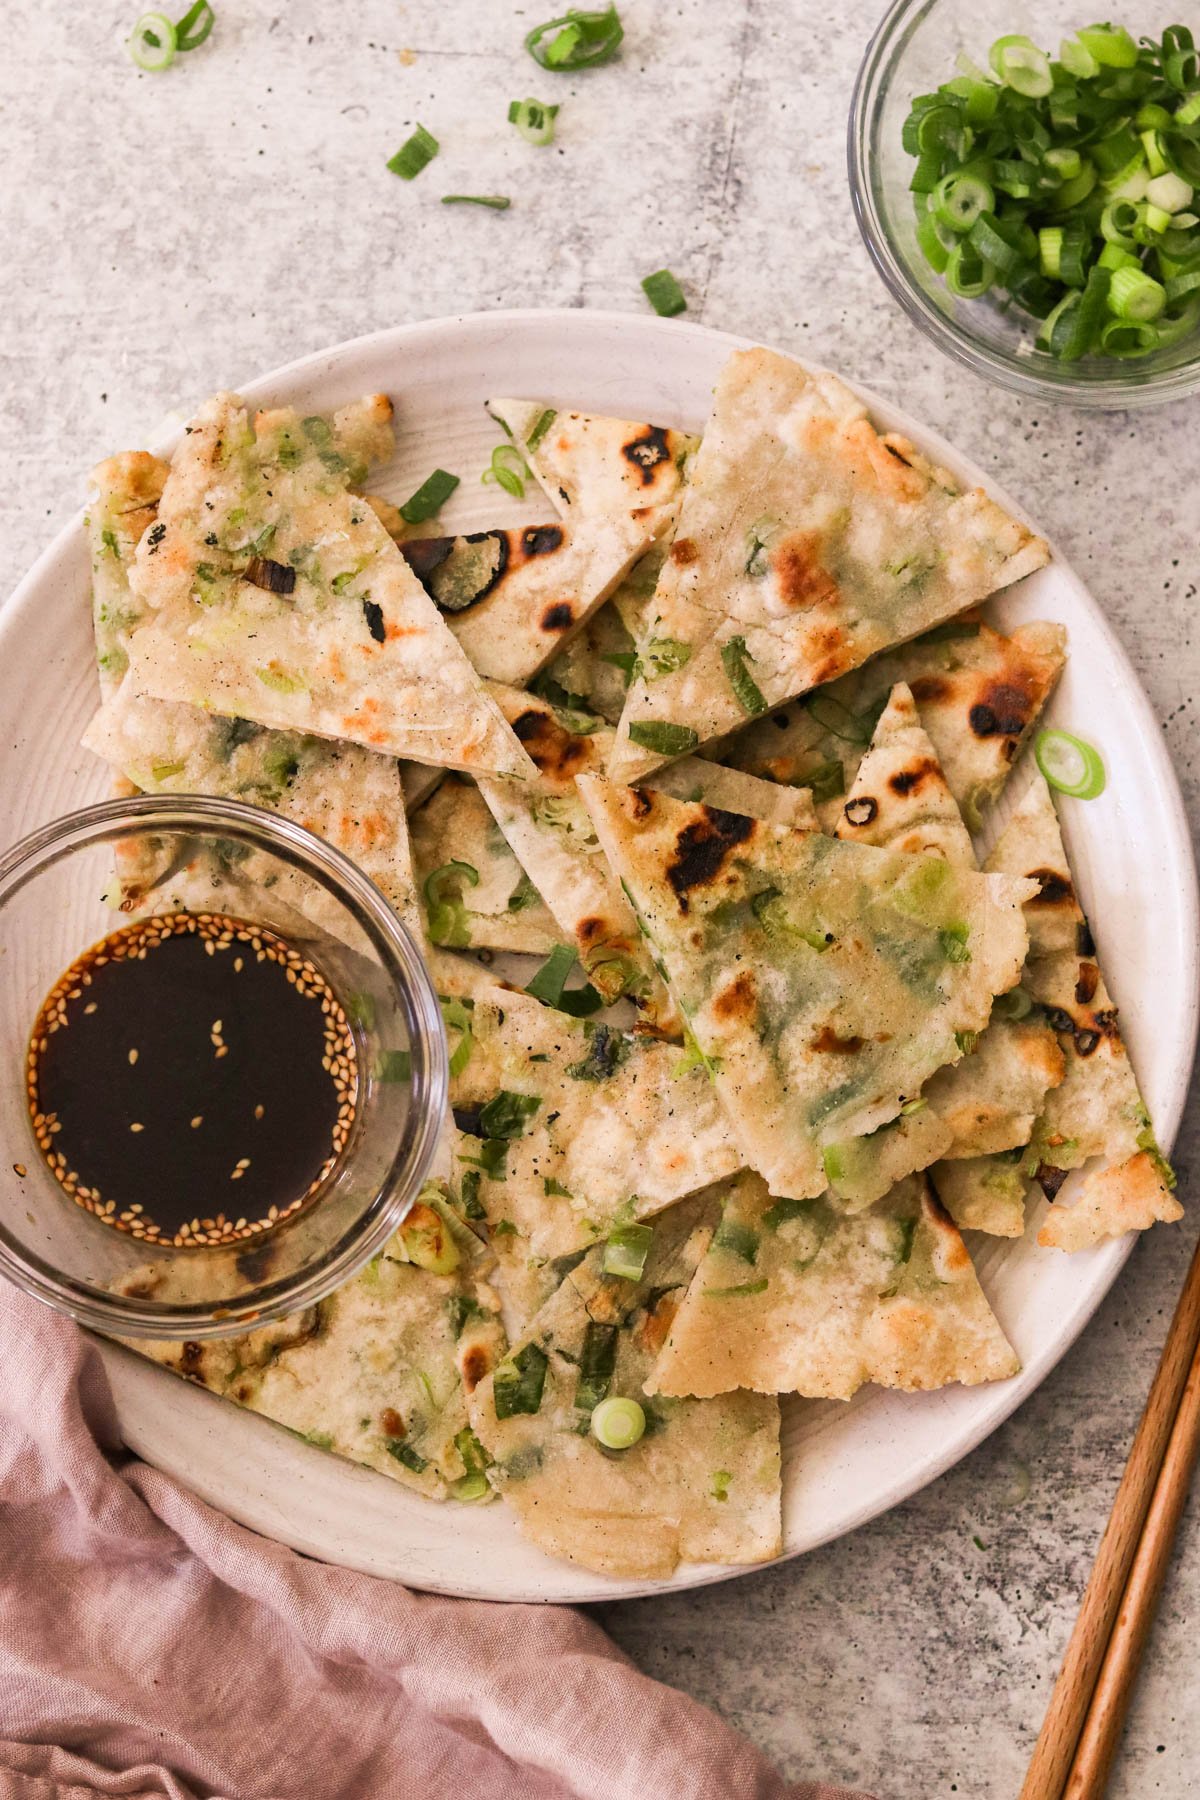
Gluten free scallion pancakes are the ultimate savory comfort food. With their perfectly crispy exterior and tender, chewy layers, these pancakes bring back all the nostalgia of dim sum, minus the gluten! This homemade version is just as flavorful as what you eat at a restaurant thanks to the fresh scallions and sesame oil that make each bite irresistible. Paired with a tangy dipping sauce, they’re a total flavor bomb. Plus, they’re surprisingly easy to make, even for beginners!
Why You’ll Love These Gluten Free Scallion Pancakes
If you’ve ever had scallion pancakes (green onion pancakes) at a Chinese restaurant, you know how irresistible their crispy edges and chewy layers are. They were always my favorite dish to order at dim sum, and I looked forward to them every time. Nothing beats the crispy outer texture with that delicious chewiness inside.
After going gluten free, I missed them so much that I decided to recreate this version at home, and it delivers all the flavor and texture of the original. I’ve also recreated Korean vegetable pancakes, Korean sweet pancakes, and Korean-style scallion & potato pancakes – check those recipes out too.
These savory pancakes are made with simple ingredients and a few easy techniques and are just as delicious as I remember. Whether you’re enjoying them as a delicious treat, appetizer, snack, or side dish, they’re so flavorful, especially when paired with the tangy dipping sauce. Trust me, once you dip a wedge into that sauce, you’ll be hooked!
Watch a Short Video of This Recipe
Ingredient Notes
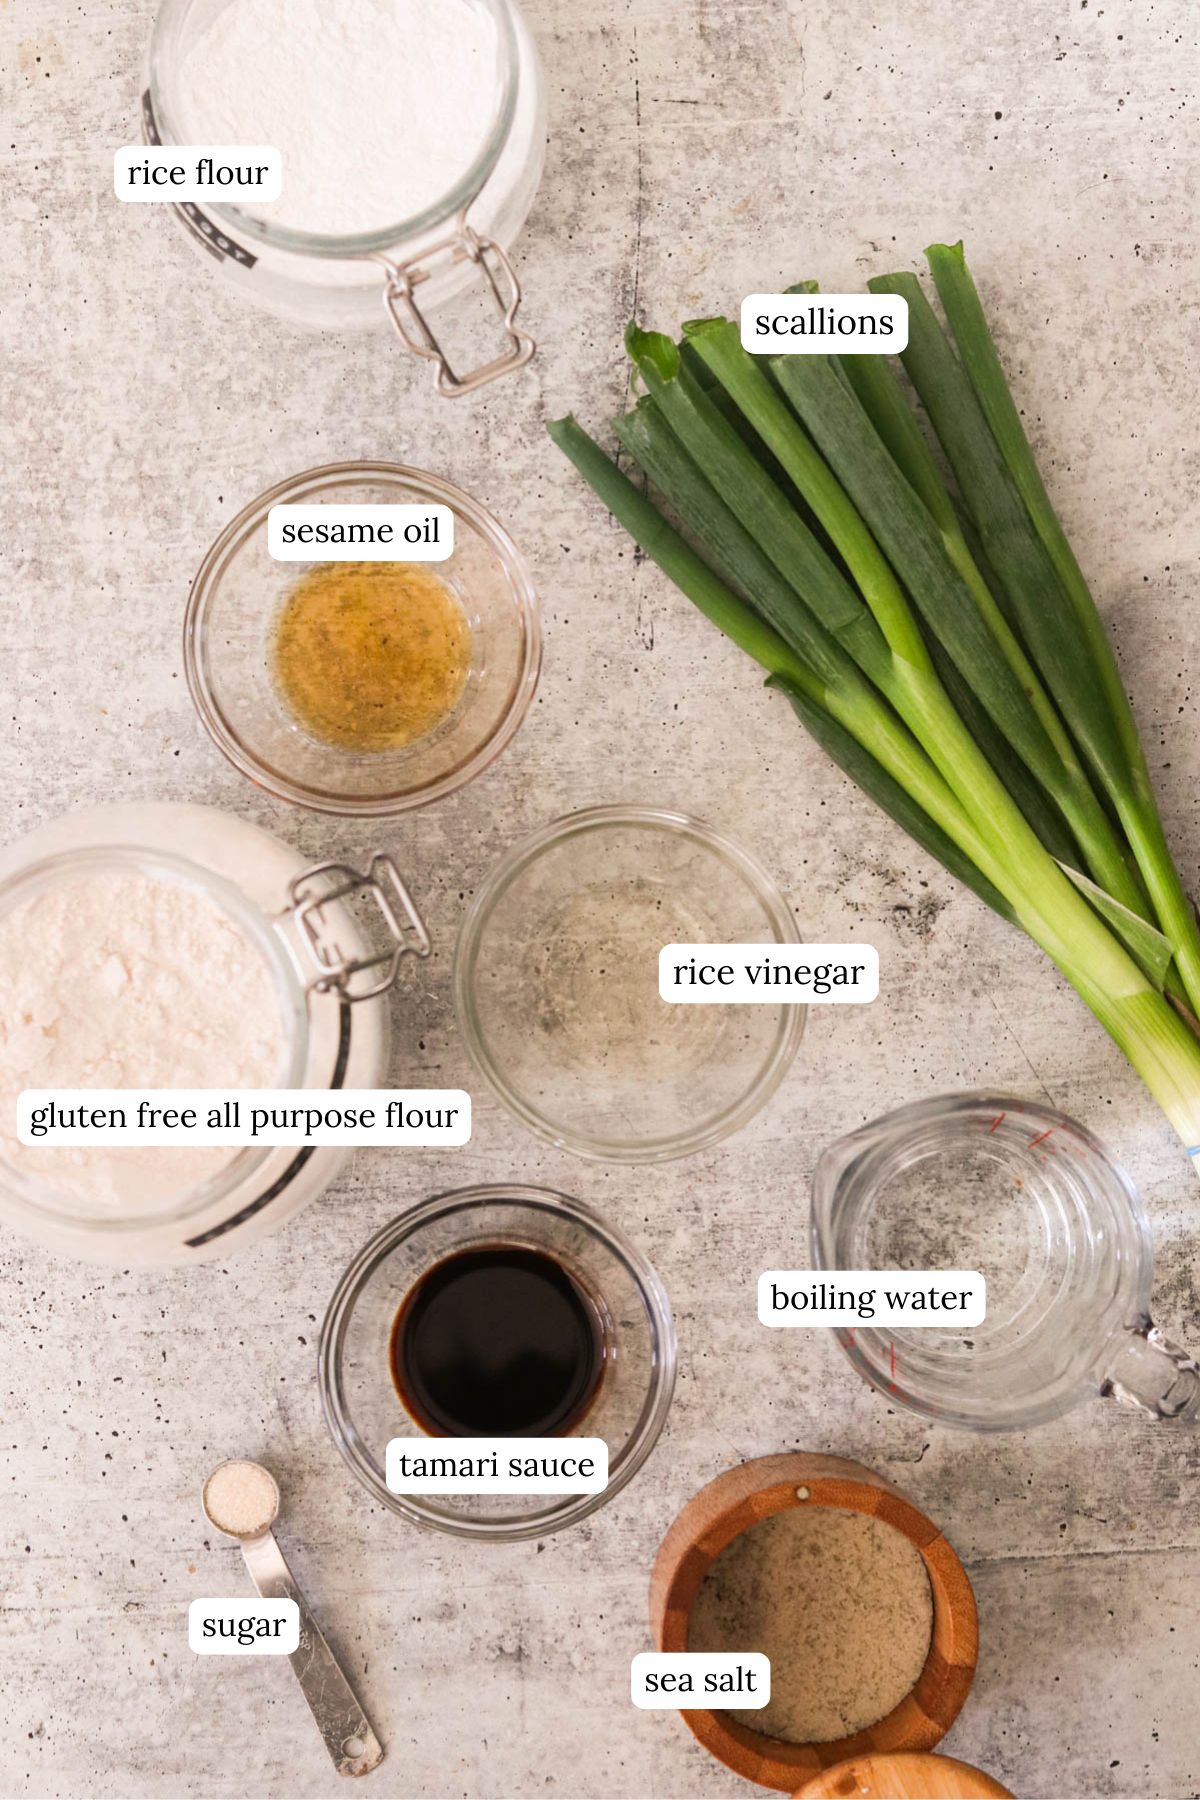
- Gluten-free all-purpose flour: Forms the sturdy base while keeping things light and stretchy—choose one with guar or xanthan gum for better structure.
- Rice flour: Adds a delicate crispness to the texture. I don’t recommend substituting tapioca flour or cassava flour here – it will alter the texture too much.
- Sea salt: Enhances all the savory flavors and balances the scallions. Himalayan or kosher salt works fine, too.
- Boiling water: Helps create a pliable dough while activating the starches for that signature chewy texture.
- Sesame oil: Infuses a rich, nutty aroma and flavor into the pancakes. Swap with toasted sesame oil for a bolder taste.
- Thinly sliced scallions (green onions): The star of the show, bringing freshness and a mild oniony zing. Chives or garlic greens are decent stand-ins if needed.
- Avocado oil or neutral-flavored oil: Perfect for pan-frying without overpowering the flavors. Olive oil (light) or sunflower oil works in a pinch.
Dipping Sauce
- Tamari sauce: A gluten-free soy sauce alternative that’s salty and umami-rich. Coconut aminos can sub for a soy-free option.
- Rice vinegar: Adds a tangy brightness to cut through the richness. Apple cider vinegar can step in if needed.
- Sugar: A touch of sweetness balances the salty and tangy vibes. Honey or maple syrup are great swaps.
- Sesame seeds (optional): For a subtle crunch and a nutty pop of flavor. Skip if you don’t have them, but they’re a fun touch!
For exact ingredient amounts and instructions, see the printable recipe card below.
How to Make Chinese Scallion Pancakes

Step 1: Combine flour, rice flour, and sea salt in a large mixing bowl and stir together.
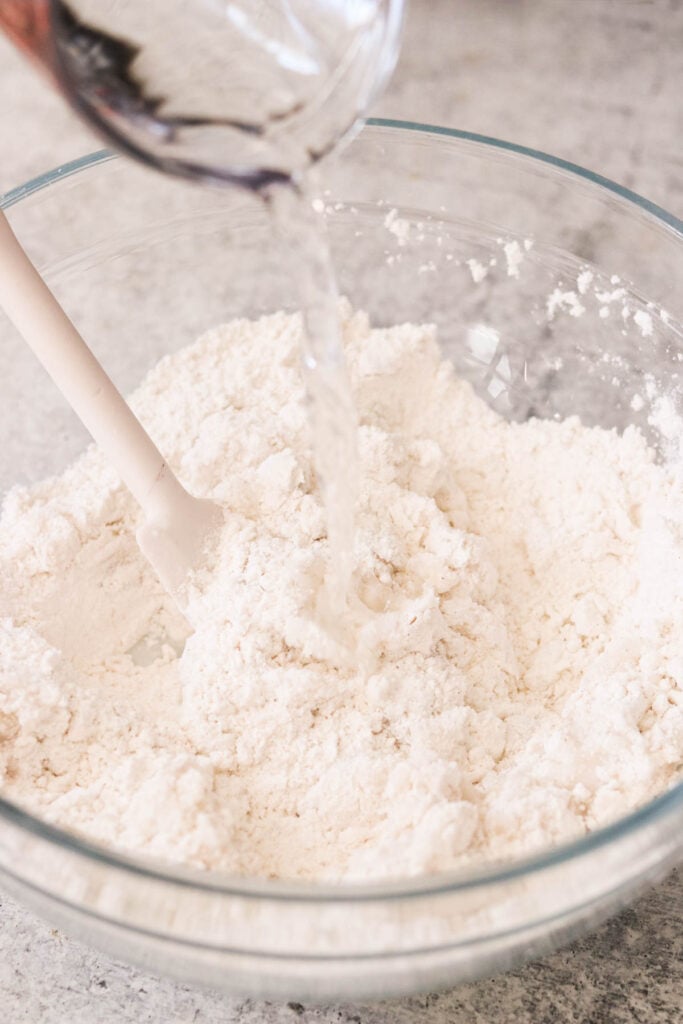
Step 2: Add boiling water and stir with a spoon until everything comes together. Use your hand to knead until a dough forms. If it’s too dry add a little bit more water and continue kneading until smooth.
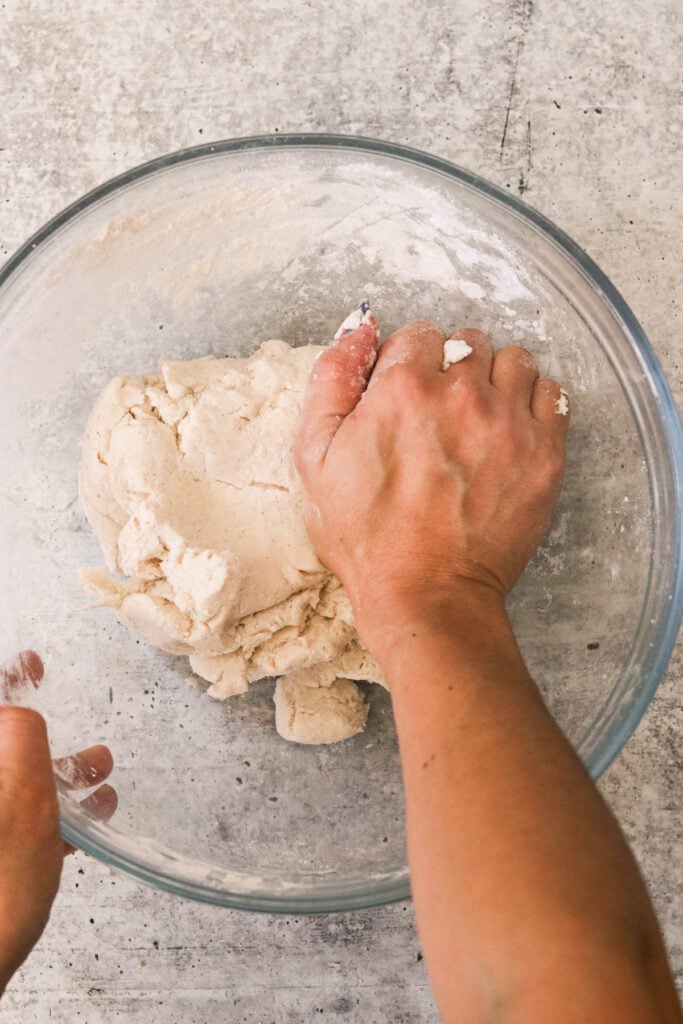
Step 3: Use your hand to knead until a dough forms. If it’s too dry add a little bit more water and continue kneading until smooth.

Step 4: Divide the dough into 6 equal pieces. Keep the remaining dough pieces covered with a damp towel or plastic wrap while you work so they don’t dry out.

Step 5: Take 1 piece of dough and place it between two pieces of parchment paper. Use a rolling pin to flatten it out to a thin rectangle. Brush on a layer of sesame oil, then add 1/4 cup of chopped scallion in an even layer – leaving about an inch of space empty on one of the longer sides.
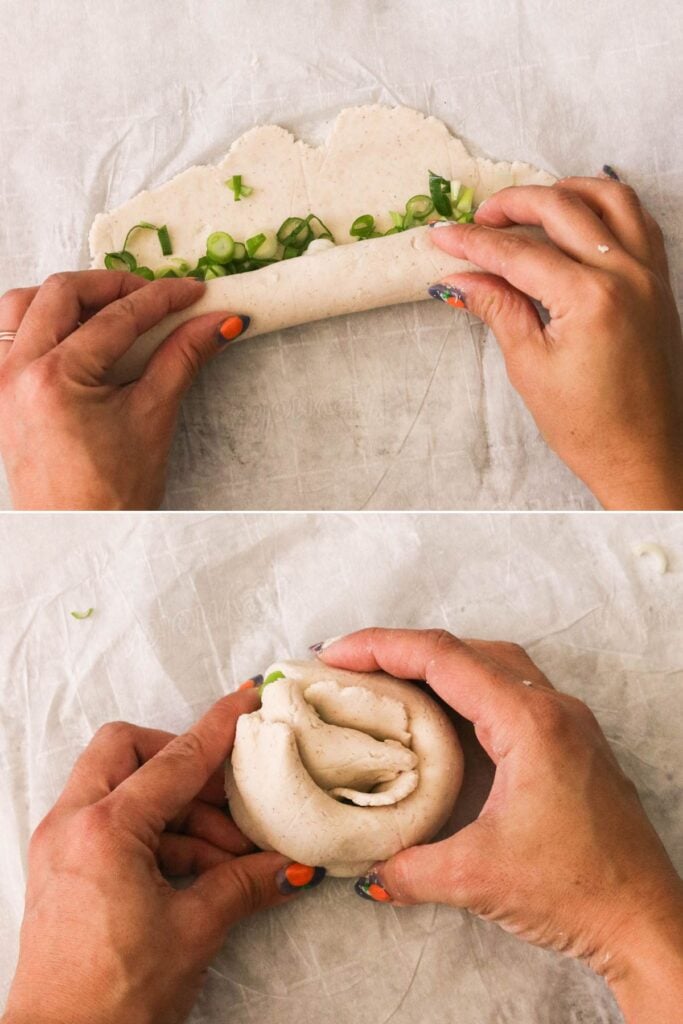
Step 6: Slowly roll up from the longer filled-up side to the empty side into a log. Take one end of the log and roll it up towards the other side into a pinwheel circle. It’s okay if the dough breaks a bit while you do this – just try to place the scallions back in the dough.

Step 7: Place the pinwheel circle in between two pieces of parchment paper and use a heavy circular plate or a pot to flatten it out. Use a rolling pin to flatten it out even more to a circle that’s about 7-8 inches in diameter (the thinner the pancake, the crispier it’ll get). Repeat with the rest of the dough pieces.

Step 8: Use a rolling pin to flatten it out even more to a circle that’s about 7-8 inches in diameter (the thinner the pancake, the crispier it’ll get). Repeat with the rest of the dough pieces.

Step 9: Heat a thin layer of oil in a large skillet over medium-high heat. When you have hot oil, add a pancake to the pan and cook the first side for 3-4 minutes until crisp and golden brown on the bottom. Flip, add more oil to the sides, then tilt the pan so the oil can spread out through the bottom. Cook for 3-4 more minutes until crispy. Transfer to a cooling rack or a cutting board while you cook the rest of the pancakes.

Step 10: Stir dipping sauce ingredients in a small bowl and serve with the warm pancakes. I like to cut each pancake into 6 or 8 triangles.

Expert Tips
- I used this gluten free all-purpose flour for this recipe. Results may vary slightly depending on which brand of gluten free flour you use.
- Rice flour is used for that delicious chewy texture. I don’t recommend substituting with another flour.
- Because you are working with gluten-free flour, the dough won’t be as elastic as regular flour. It’s fine if the dough rips a bit while you work. You’ll flatten it into a thin circular pancake anyway.
Serving Tips
Pair with a bowl of hot and sour soup or serve as an appetizer alongside dumplings or stir-fry.

Storage Tips
These are best enjoyed freshly made and still warm. They’ll lose their crispiness the longer they sit. However, leftover pancakes can be stored in an airtight container for 3-4 days in the fridge. Heat and crisp them back up by re-frying them for a minute or 2 on each side, or air fry at 400 degrees F for 2-3 minutes per side.
You can make the dough ahead of time and freeze. After you roll up the dough into a pinwheel, freeze in a freezer-safe container for up to 3 months. You can thaw them in the fridge, then flatten them out into pancakes right before frying and serving.
Recipe FAQs
Gluten-free doughs are less elastic, so some cracking is normal. The end result will still be crispy and delicious!
While frying gives the best texture, you can bake them at 425°F on a parchment-lined baking sheet. Brush with oil and bake for about 12–15 minutes, flipping halfway. Let me know if you try this method.
More Gluten-Free Recipes
If you make this recipe, please leave me a star rating and comment below! I love to hear your thoughts and feedback. Follow me on social media Instagram, Facebook, and Pinterest for even more delicious recipes!

Easy Gluten Free Scallion Pancakes
Video
Ingredients
- 2 cups gluten free all-purpose flour
- 1/2 cup rice flour
- 3/4 tsp sea salt
- 1 cup boiling water, plus more, if needed
- 1 tbsp sesame oil
- 1½ cup thinly sliced scallions, also called green onions
- Avocado oil, or any neutral flavored oil
Dipping Sauce
- 2 tbsp tamari sauce
- 1½ tbsp rice vinegar
- 1/2 tsp sugar
- Optional: 1 pinch sesame seeds
Instructions
- Combine flour, rice flour, and sea salt in large bowl and stir together.2 cups gluten free all-purpose flour, 1/2 cup rice flour, 3/4 tsp sea salt
- Add boiling water and stir with a spoon until everything comes together. Use your hand to knead until a dough forms. If it's too dry add a little bit more water and continue kneading until smooth.1 cup boiling water
- Divide the dough into 6 equal pieces. Keep them covered with a damp towel while you work so they don't dry out.
- Take 1 piece and place between two parchment paper. Use a rolling pin to flatten it out to a thin rectangle.
- Brush on a layer of sesame oil, then add 1/4 cup of chopped scallion in an even layer – leaving about an inch of space empty on one of the longer sides.1 tbsp sesame oil
- Slowly roll up from the longer filled up side to the empty side into a log. Take one end of the log and roll it up towards to the other side into a pinwheel circle. It's okay if the dough breaks a bit while you do this – just try to place the scallions back in the dough.
- Place the pinwheel circle in between two parchment paper and use a heavy circular plate or a pot to flatten it out. Use a rolling pin to flatten it out even more to a circle that's about 7-8 inches in diameter (the thinner the pancake, the crispier it'll get).
- Repeat with the rest of the dough pieces.
- Heat a thin layer of oil in a large skillet over medium heat.Avocado oil
- Add a pancake to the pan and cook for 3-4 minutes until crisp and browned on the bottom. Flip, add more oil to the sides, then tilt the pan so the oil can spread out through the bottom. Cook for 3-4 more minutes until crispy.
- Transfer to a cooling rack or a cutting board while you cook the rest of the pancakes.
- Stir dipping sauce ingredients in a small bowl and serve with the warm pancakes. I like to cut each pancake in to 6 or 8 triangles.2 tbsp tamari sauce, 1½ tbsp rice vinegar, 1/2 tsp sugar
Notes
- I used this gluten free all-purpose flour for this recipe. Results may vary slightly depending on which brand of gluten free flour you use.
- Rice flour is used for that delicious chewy texture. I don’t recommend substituting with another flour.
- Because you are working with gluten-free flour, the dough won’t be as elastic as regular flour. It’s fine if the dough rips a bit while you work. You’ll flatten it into a thin circular pancake anyway.
- These are best enjoyed freshly made and still warm. They’ll lose their crispiness the longer they sit. However, leftover pancakes can be stored in an airtight container for 3-4 days in the fridge. Heat and crisp them back up by re-frying them for a minute or 2 on each side, or air fry at 400 degrees F for 2-3 minutes per side.
- You can make the dough ahead of time and freeze. After you roll up the dough into a pinwheel, freeze in a freezer-safe container for up to 3 months. You can thaw them in the fridge, then flatten them out into pancakes right before frying and serving.
Nutrition
Nutrition information is automatically calculated, so should only be used as an approximation.
What Great Grandma Ate / Jean Choi is a participant in the Amazon Services LLC Associates Program, an affiliate advertising program designed to provide a means for sites to earn advertising fees by advertising and linking to Amazon.com.
Regarding other affiliate links and affiliate relationships: In order for me to support my blogging activities, I may receive monetary compensation or other types of remuneration for my endorsement, recommendation, testimonial and/or link to any products or services from this blog. Thank you for your support and understanding.