
This post may contain affiliate links. Please see our disclosure policy.

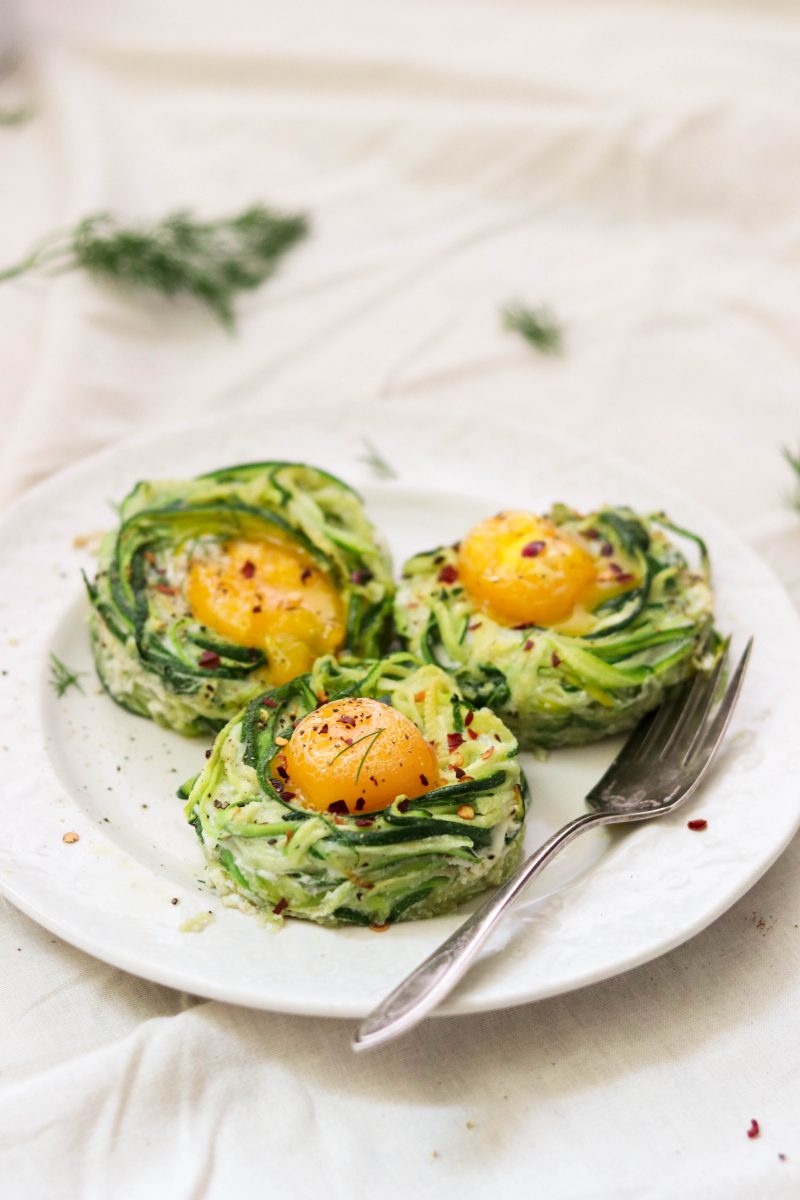
Learn how to make the perfect zucchini egg nests that are sturdy, easy, and so yummy! They are a healthy breakfast item that’s paleo, Whole30, and keto-friendly.
Now that we finally moved into our new house (YESSSS), we are so excited to have get togethers with friends in our spacious home. Brunch is my favorite meal, so I’m thinking I need to host more weekend brunches for me and my girlfriends over the summer.
Whenever I host, I’m always looking for new recipe ideas that are fun and delicious, and zucchini egg nests have recently been on top of my mind to perfect. I’ve been refining this recipe over and over again because they have come out too watery or too weak to hold their shape while eating.
Zucchini Egg Nests Recipe
Well, after several attempts, I think I finally found a method to making the perfect zucchini egg nests that are not only so pretty to look at (yes, that matters!), but also sturdy, flavorful, and really easy! After you make it this way, I don’t think you’ll go back to any other method. It’s seriously comes out perfect every time.
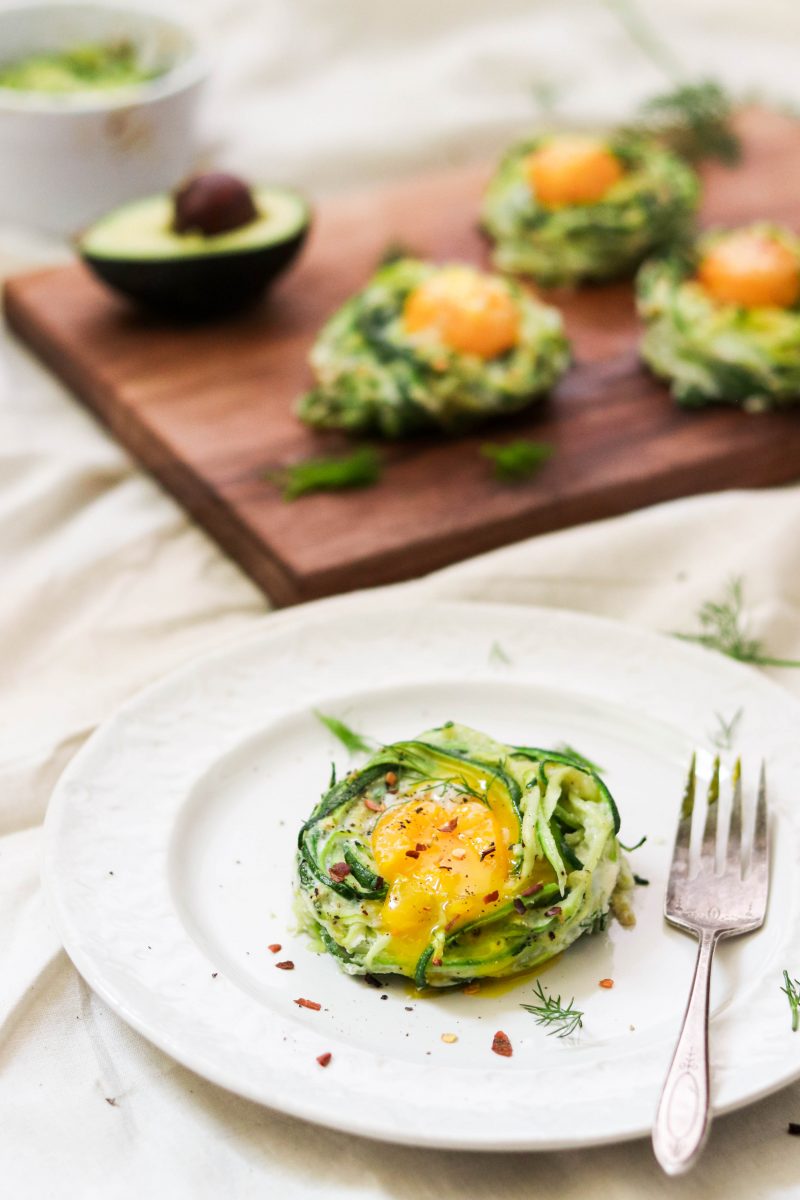

How To: Perfect Zucchini Egg Nests
One of the most important part of making the perfect zucchini egg nests is to first sweat the zucchini to squeeze out as much moisture as possible. Without this step, they can come out watery or they won’t be sturdy enough to comfortably eat without falling apart. And another bonus to this method? You end up eating way more veggies in the process because the zucchini will shrink down to half their size after the moisture is squeezed out.
Another step that took my zucchini egg nests to the next level is separating the yolk from the whites, then mixing the egg whites with the zucchini. It might seem tedious but this helps the zucchini firm up really well during the baking process, and makes the yolks pop in color.
Lastly, use a jumbo muffin tin or a ramekin to help the egg nests hold their shape. This seriously helps so much!

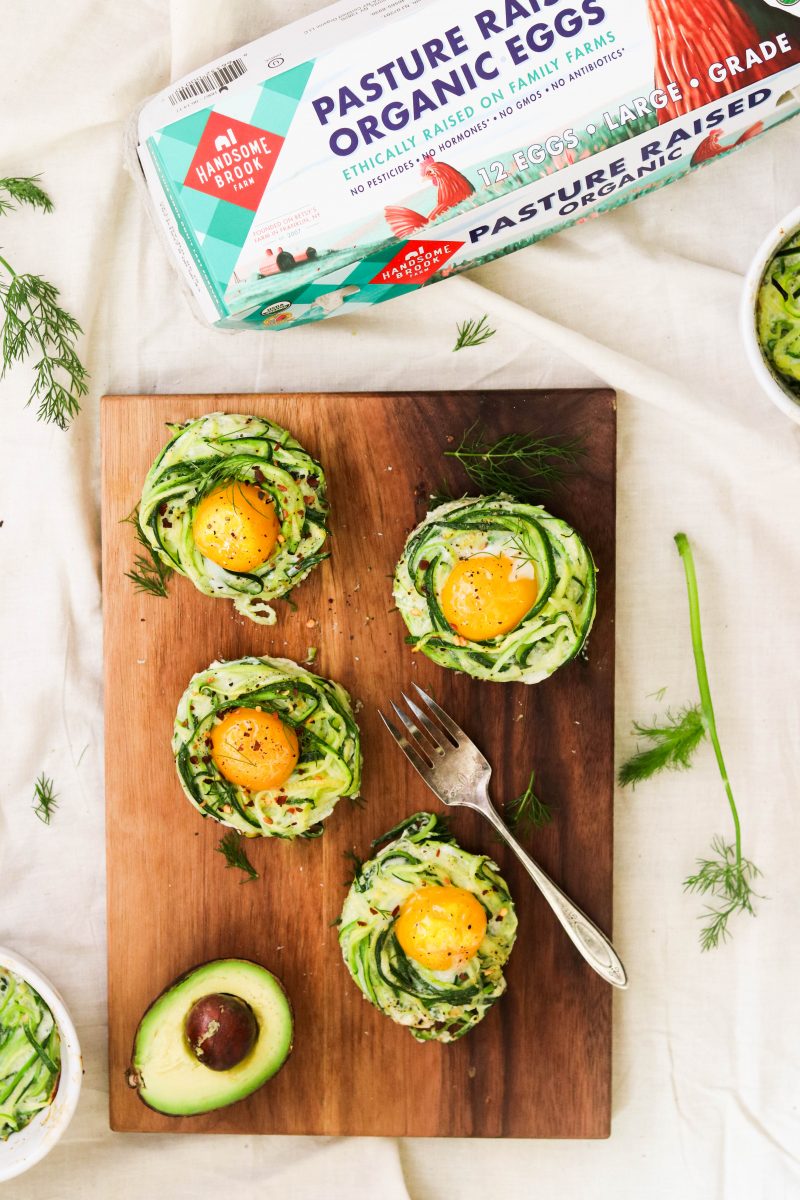
Handsome Brook Farm Eggs
Before I get to the full recipe, I first want to highlight the importance of using the highest quality eggs for their nutrition profile, health benefits, and taste. Eggs are one of my grocery list items that I always try to purchase pasture raised, because there’s such a huge difference in quality when it comes to the different labels.
My recent favorite brand is , because they are so transparent about how their chickens are raised which I respect so much. Their hens get at least 108 square feet per bird on rotated pastures, and they believe that the happier and healthier the hen, the tastier the egg. Pasture raised is the most humane for the hen and more delicious and nutritious for us! How awesome is that??
If you want to learn more about egg labels and what they exactly mean (and don’t mean), you can read my post here.
Now go pick up some Organic, Pasture Raised Eggs and make these perfect zucchini egg nests! I hope you enjoy them as much as I did.


How to Make Perfect Zucchini Egg Nests (Paleo, Whole30, Keto)
Ingredients
- 3 large zucchini, or 4 small, enough to yield 6 cups spiralized
- 1 tsp sea salt, plus more to taste
- 1/4 tsp garlic powder
- 1/4 tsp onion powder
- 1/8 tsp ground black pepper, plus more to taste
- Ghee, or coconut oil, for greasing
- 6 Handsome Brook Farm eggs
- Optional: Crushed red pepper, spices, fresh herbs like dill, cilantro, parsley, for garnish
Instructions
- Use a vegetable peeler or a spiralizer to slice the zucchini in to noodles.
- Place in a colander over a bowl and toss with sea salt until evenly coated.
- Let the zucchini noodles sit for 20 minutes so they can sweat.
- Preheat oven to 400 degrees F, and use ghee or coconut oil to generously grease a 6-cup jumbo muffin tin or 6 ramekins that are at least 3.5 inches in diameter.
- Use your hands to squeeze the zucchini noodles to release as much moisture as possible.
- Place in a bowl and add garlic powder, onion powder, and ground black pepper.
- Carefully separate the egg whites from the yolk. The easiest way to do this is crack an egg into your hand over a bowl, then pass the egg yolk from one hand to another until the whites drip down between your fingers into the bowl.
- Place the yolks on a plate, and add the whites to the zucchini noodles and mix together.
- Divide the zucchini noodles into the prepared muffin tin cups or ramekins. Create a nest and leave an indent in the center.
- Carefully place a yolk in the center of each zucchini nest.
- Sprinkle with more salt and pepper.
- Bake for 15-20 minutes until the yolks are cooked to your liking.
Nutrition
Nutrition information is automatically calculated, so should only be used as an approximation.
Regarding other affiliate links and affiliate relationships: In order for me to support my blogging activities, I may receive monetary compensation or other types of remuneration for my endorsement, recommendation, testimonial and/or link to any products or services from this blog. Thank you for your support and understanding.
Thank you for this recipe. Second time around I sweated some thinly sliced onion and added finely chopped red pepper and topped off with parmigiana right out of the oven for a special brunch with my husband. Served with strawberry hearts on a plate.❤️
That sounds wonderful! Thanks so much for trying out my recipe.
Hy, I tried this at home and it tasted so amazing that everybody ate all of them, and I didn’t get even a bite of it. Sad, but it’s okay what else will anyone want other than someone one liking your dish so much.
Thank you so much and also keep sharing such drooling recipe;)
So glad you enjoyed it!! Thanks so much.