
This post may contain affiliate links. Please see our disclosure policy.

What is Kkakdugi?
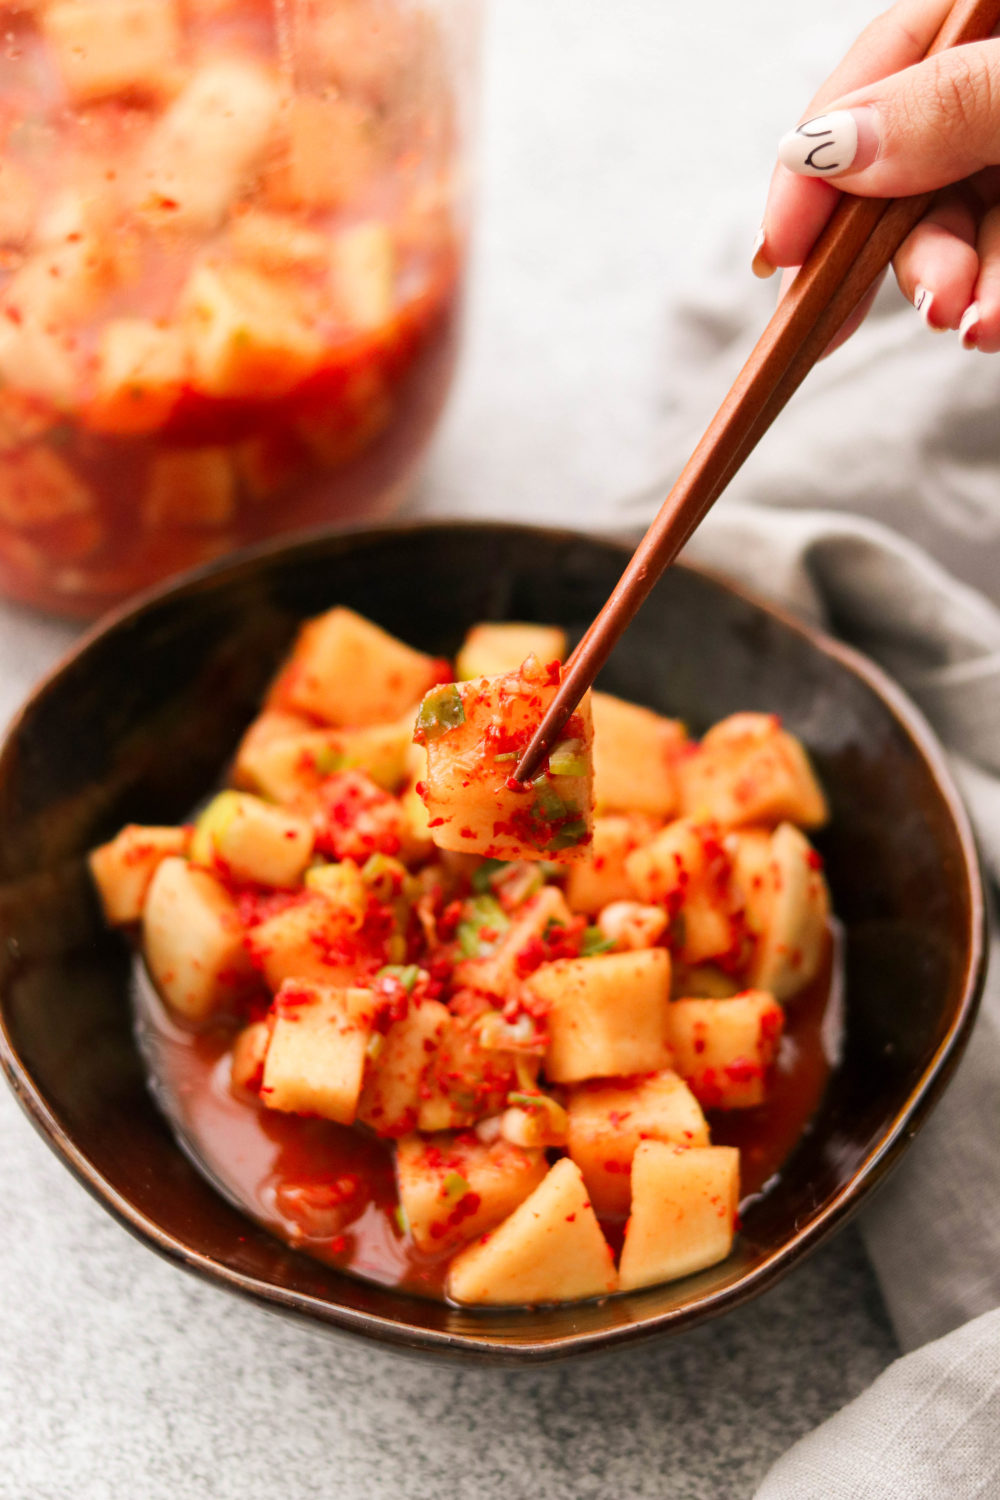
Kkakdugi is a traditional Korean radish kimchi made by fermenting cubed radish (mu) with garlic, ginger, gochugaru, and fish sauce. It’s crunchy, tangy, slightly spicy, and ready to eat after just 1-2 days of fermentation.
Watch a Quick Recipe Video
Subscribe to my YouTube channel for more cooking videos and other fun tutorials!
Why You’ll Love This Recipe
Kkakdugi holds a special place in my kitchen because it’s both comforting and practical. Among the many varieties of kimchi, cubed radish kimchi stands out for its refreshing crunch and balanced flavor. I still love how it transforms a simple bowl of rice or stew into something special.
I still remember watching my mom press the radish cubes firmly into jars, making sure there were no air pockets, and sneaking a taste even before it was fully fermented. That crisp bite and gentle heat is pure nostalgia!
This kkakdugi recipe is naturally paleo, Whole30, and keto, and you can make it vegan by swapping the fish sauce for tamari or soy sauce. It’s a Korean side dish (banchan) that pairs beautifully with pork bulgogi, Korean short ribs, soups, or even tucked into wraps and sandwiches. Best of all, it ferments quickly – you can start enjoying it in just 24-48 hours, and it lasts for months in the fridge.
Ingredients You’ll Need

- Korean radish (mu): If you can’t find it, use daikon as a reliable daikon kimchi substitute.
- Sea salt: Helps draw out water and kickstart fermentation.
- Garlic: No kimchi is complete without it.
- Ginger: Adds subtle warmth and depth.
- Green onions: Chopped small for even distribution.
- Gochugaru (Korean chili flakes): Provides heat, color, and that signature flavor.
- Fish sauce: Many brands contain additives, but I recommend Red Boat Fish Sauce for the highest quality. It’s also paleo and Whole30-friendly. For a vegan version, use tamari or soy sauce.
How to Make Korean Radish Kimchi
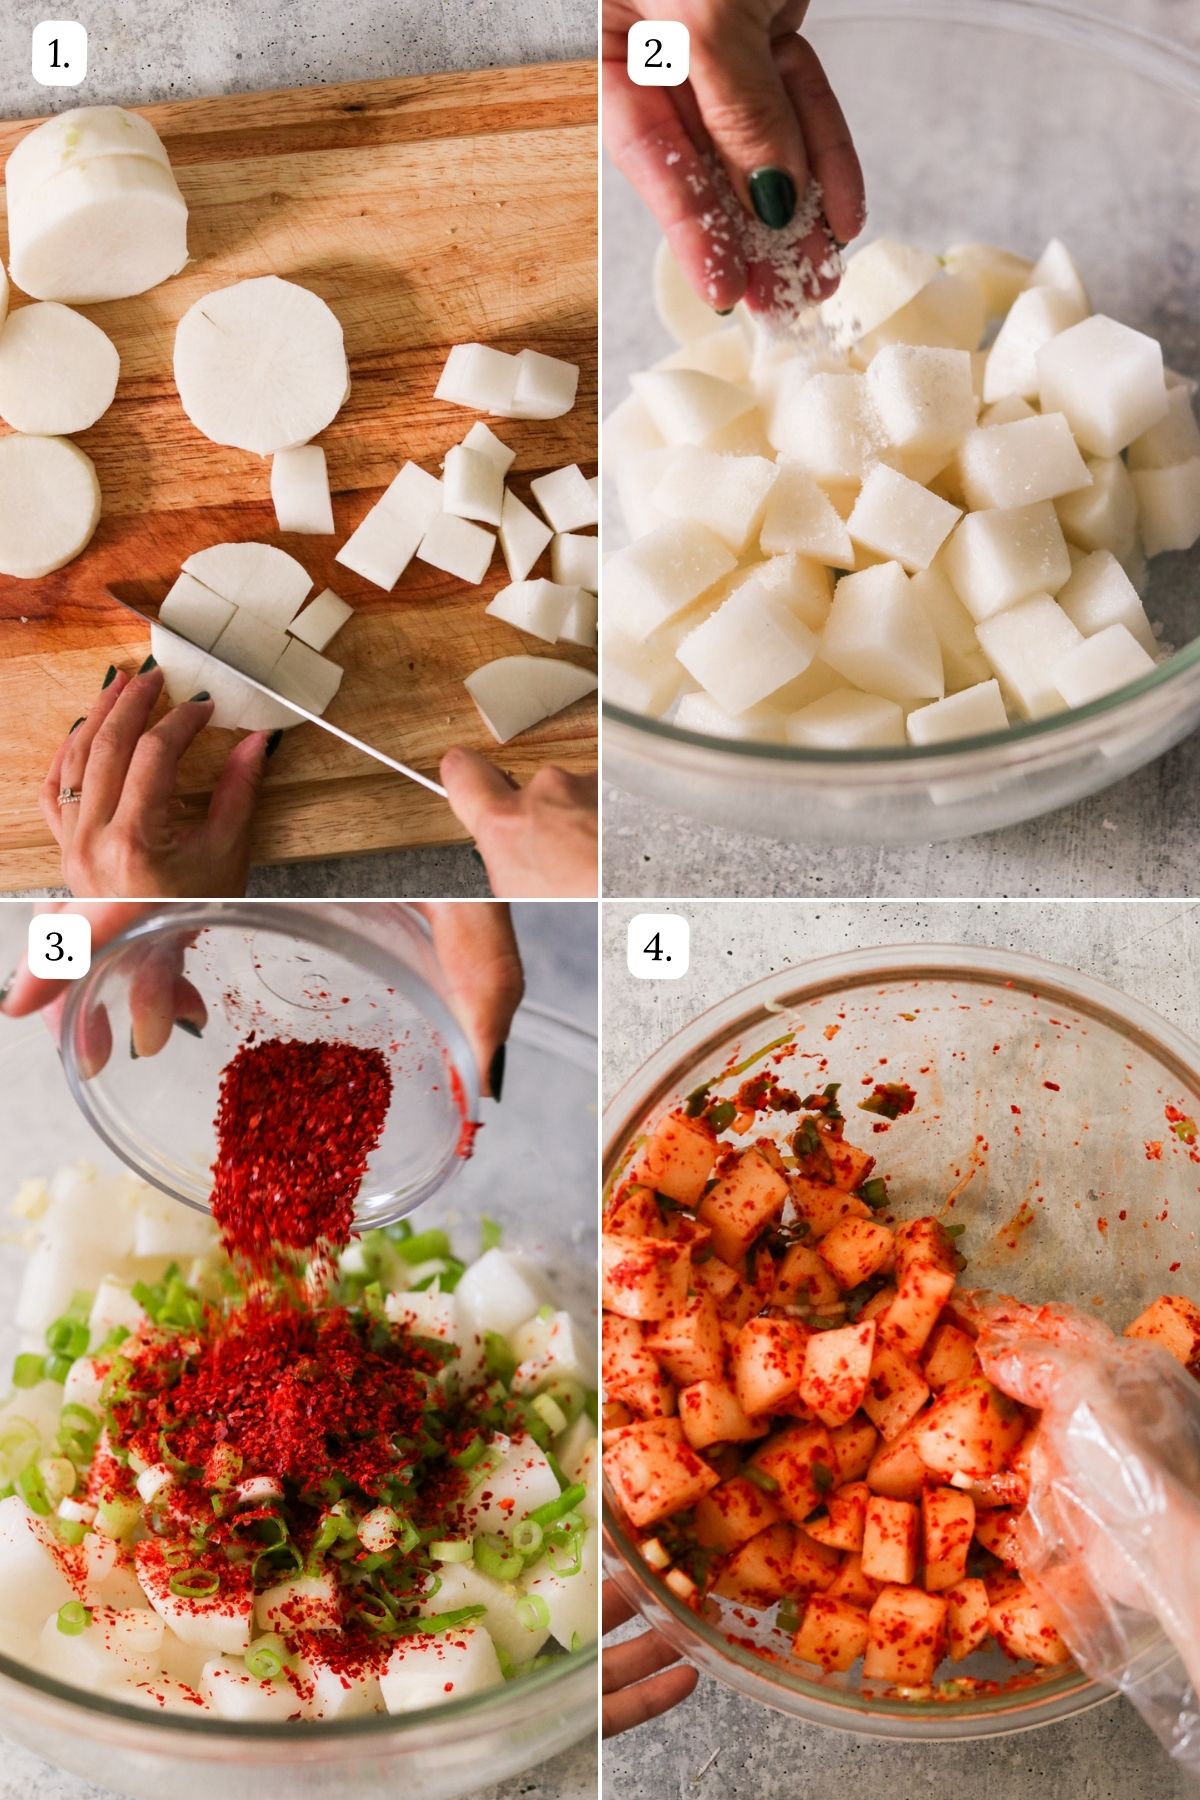
Step 1: Rinse the radish, trim the ends, and peel if desired. Cut into 1-inch bite-sized cubes and place in a large mixing bowl.
Step 2: Sprinkle with sea salt and toss to coat. Let the radish sit for 30 minutes until it releases some liquid and softens. Drain off the excess liquid.
Step 3: Wearing plastic gloves, add garlic, ginger, green onions, gochugaru, and fish sauce (or vegan substitute). Mix well with your hands until the radish is evenly coated.
Step 4: Taste and adjust seasoning. Keep in mind that the flavor will intensify as it ferments.
Step 5: Pack the mixture tightly into a glass jar with an airtight lid, pressing down to remove air pockets. Leave at least 2 inches of space at the top.
Step 6: Close the lid and leave the jar at room temperature, out of direct sunlight, for 24-48 hours to ferment.
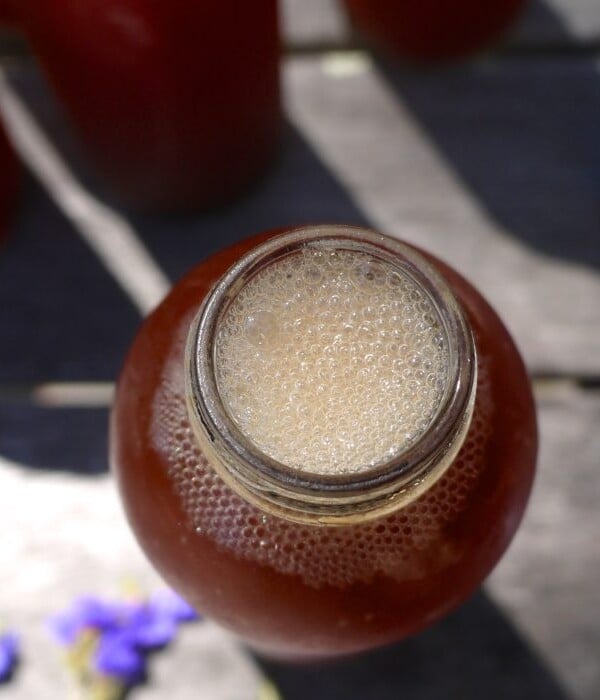
Step 7: You’ll know it’s ready when you see small bubbles and smell a sour, tangy aroma. Taste to check if it has fermented to your preference. You can also taste it to check to see that it has fermented to your liking.
Step 8: Store your kkakdugi in the fridge and eat it with everything! It will keep well for longer than a year, but you may want to eat it within 3 to 4 months before it gets too sour.
Expert Tips for the Best Kkakdugi
- Adjusting to taste: Every household has its own flavor. Add more gochugaru for a spicy radish kimchi, or extra fish sauce for a saltier kick.
- Fermentation preference: I like my kimchi on the sour side, so I ferment for the full 2 days. If you prefer it milder, stop after 24 hours.
- Gloves are your friend: Gochugaru can stain and leave a lingering tingle on your hands. Use disposable gloves when mixing. When I first made this without gloves, I didn’t realize how long that tingle would last – lesson learned!
- Jar choice: A 64-oz glass jar works well for a full batch, but you can also split it into smaller jars.
Serving Ideas
Kkakdugi is versatile and brings brightness to any meal. Try it:
- As a Korean side dish (banchan) alongside your favorite main dishes.
- With a warm bowl of steamed rice.
- Stirred into soups for extra flavor.
- Serve it with grilled dishes, like Grilled Artichokes with Gochujang Aioli.
- On top of noodles or tucked into sandwiches and wraps.
- With fusion dishes, like Spicy Thai Basil Chicken Fried Rice.
Storage & Fermentation Notes
Once it’s fermented, homemade kimchi recipe versions like kkakdugi can last for a year in the fridge, though I recommend enjoying it within 3-4 months for the best balance of flavor and crunch. The longer it sits, the sourer it will become.
Kkakdugi lasts up to a year in the fridge but tastes best within 3-4 months before becoming too sour.

Recipe FAQs
It’s made with cubed radish (mu), sea salt, garlic, ginger, green onions, gochugaru, and fish sauce (or vegan substitute).
You can enjoy it after just 1 day, but I prefer 2 days for a tangier flavor.
Yes! Replace the fish sauce with tamari or soy sauce.
No. Radish has natural sugars that allow fermentation. If you like a sweeter flavor, add a little sugar before packing into jars.
This kkakdugi recipe is a simple, approachable way to experience the bold, refreshing flavors of Korean fermentation at home. Whether you enjoy it with rice, soups, or alongside BBQ, it’s a crunchy, tangy side dish that only gets better with time.
More Korean-Inspired Recipes to Try
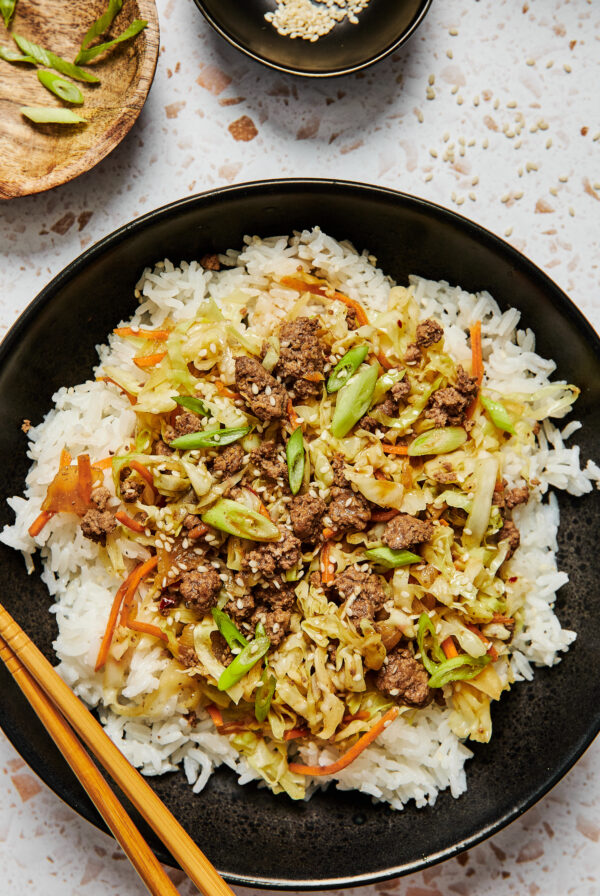
30 Minutes or Less
Easy Asian Ground Beef and Cabbage Stir Fry

30 Minutes or Less
Easy Korean Cucumber Salad (Oi Muchim)
If you make this Korean radish kimchi recipe, please leave me a star rating and comment below! I love to hear your thoughts and feedback. Follow me on social media Instagram, Facebook, and Pinterest for even more delicious recipes!

Korean Radish Kimchi (Kkakdugi Recipe)
Video
Equipment
- Plastic gloves
- 64 oz jar (or use multiple smaller jars)
Ingredients
- 3 lb Korean radish, or daikon radish
- 4 tsp sea salt
- 5 cloves garlic, minced
- 1 inch fresh ginger, grated
- 4 stalks green onions, chopped
- 1/3 cup gochugaru, Korean red pepper flakes
- 1/4 cup fish sauce, or tamari sauce for vegan
- OPTIONAL : 1-2 tbsp sugar, omit for Whole30 or keto
Instructions
- Rinse the radish and peel. Cut the radish into bite-sized cubes and put them in a large mixing bowl.
- Sprinkle with sea salt and toss together to coat. Let this rest for 30 minutes so the radish can sweat out its juice and soften. Drain out the juice.
- I highly recommend you wear plastic gloves before this step: Add the garlic, ginger, green onions, gochugaru, and fish sauce. Add sugar if you wish. Mix everything well with your hands so the spices are evenly coated.
- Taste to add more gochugaru or fish sauce, if needed. Keep it mind that the kimchi will get saltier as it ferments.
- Transfer to a glass jar with an airtight lid, pressing down firmly with your hand as you pour it in so the mixture is compact in the jar and there are no air bubbles. Make sure the top of the kimchi is at least 2 inches below the opening of the jar.
- Close the lid and let it sit at room temperature out of sunlight for 24 to 48 hours while it ferments. Check after 24 hours.
- It's ready when you open the lid and you see small bubbles escaping off the top and the kkakdugi has a strong, sour smell. You can also taste to check to see that it has fermented to your liking.
- Store your kkakdugi in the refrigerator and eat it with everything! It will keep well for longer than a year, but you may want to eat it within 3 to 4 months before it gets too sour.
Notes
Expert Tips
- Adjusting to taste: Every household has its own flavor. Add more gochugaru for a spicy radish kimchi, or extra fish sauce for a saltier kick.
- Fermentation preference: I like my kimchi on the sour side, so I ferment for the full 2 days. If you prefer it milder, stop after 24 hours.
- Gloves are your friend: Gochugaru can stain and leave a lingering tingle on your hands. Use disposable gloves when mixing. When I first made this without gloves, I didn’t realize how long that tingle would last – lesson learned!
- Jar choice: A 64-oz glass jar works well for a full batch, but you can also split it into smaller jars.
Storage Tips
- Just like regular kimchi and many other fermented foods, this Korean radish kimchi (kkakdugi) will last indefinitely in the refrigerator.
- However, it’ll still continuously ferment slowly while chilling, so you may want to eat it within 3-4 months of making it. Otherwise, the flavor may get too sour for you to enjoy.
Nutrition
Nutrition information is automatically calculated, so should only be used as an approximation.
Regarding other affiliate links and affiliate relationships: In order for me to support my blogging activities, I may receive monetary compensation or other types of remuneration for my endorsement, recommendation, testimonial and/or link to any products or services from this blog. Thank you for your support and understanding.


Do I have to ferment the kimchi? Can I just put it in the fridge in an airtight container?
You don’t have to. It’ll ferment much slowly in the refrigerator. You can eat it unfermented but it’ll be a bit bitter and not as flavorful.
My husband loves radishes I can’t wait to make this for him
Getting ready to try this recipe again. The batch I made in early summer with turnips turned out good and was a hit with everyone who tried it. I just harvested a bunch of icicle radishes from my garden. I am going to follow this recipe using them and I am also going to add some fresh radish greens and sliced red pepper. I will let you know what happens.
Sounds delicious. Hope it turns out well!!
It turned out great! I did not have quite enough of the icicle radishes to get the full three pounds needed, so I washed (twice, thoroughly) a bunch of the leftover radish greens, chopped them up fine, and added them to the mix. I also had a few sweet red peppers on hand and chopped them up and added them too. Turned out great. Everyone who tried it liked it. I thought the greens gave it a nice extra added flavor, and the peppers went well with it too. Wish I could attach a picture.
Could I use a pear or apple to sweeten this? I know asian pear is used in cabbage kimchi.
Yes – that’ll work fine!
This looks like a good recipe and I am going to give it a try. How do you think it would turn out to use turnips in place of radishes? I have a lot of them in my garden and am looking for something to do with them.
I’ve never tried! It’s not used in traditional kimchi. I think it would work though!
Recipe was very easy to follow. Thank you so much for sharing this. I went to a local Asian market and got all the ingredients I needed. Noticed they had the Korean radishes so I picked up a little over three pounds of those too. Made two batches: one following your recipe to the T using the Korean radishes, and a second batch that used the little bit of Korean Radish that was left, then about a pound and a half of regular purple top white globe turnips from my garden, and I made up the remainder with carrots and white radishes (also from my garden). I let it ferment in a dark cabinet at room temperature in 1 pint mason jars for two days. Ended up with 8 pints all together. Checked them this morning and all were fermenting and bubbling nicely. Rotated them into my fridge and will give them a couple of weeks to age. I did sample them. The Korean radish batch tasted excellent. As for the other batch, the turnips tasted good but I sampled a piece of the white radish and it was a tad bitter. However, I expect the flavor to improve and I expect to flavor of the carrots and turnips to offset the bitterness of the white radishes. I will let you know how it turns out but I am pretty confident both batches will be great. I posted a short video of the fermentation on Facebook. Thought it was pretty cool. Now to start work on this year’s batch of homemade wine….
Link to the video. https://www.facebook.com/dan.stewart.528/videos/10217769081080715
So glad you liked it! And I love experimenting with recipes like that. I bet the carrots taste wonderful in there!
I have kept it in the fridge for the last two weeks and tried some today. The flavor has really sunk in well. The kimchi made with ordinary purple top turnips tasted very similar to the kimchi I made with only mu radish. Both turned out great. The batch with the turnips also had some American white radish and carrots in it. The carrots tasted great and the white radish was not bad, but some people might find it a tad strong. I am going to make another batch today using only purple top turnips. Quick question, I noticed when opening them yesterday that they were still fermenting after two weeks in the fridge. Is that normal?
That’s great! So glad they turned out well. Yes, it’s completely normal for kimchi to continuously ferment in the fridge. The fermentation process is much slower than at room temperature, but it keeps going. Hope you enjoy!!
I grow my own cayenne peppers and grind them. I’m wondering what the taste difference is between those and the Korean red pepper flakes would be. Any idea? Also, what would you say is the heat factor of this dish?
Thank you!
You really can’t make authentic kimchi without the Korean pepper flakes or ground pepper called gochugaru (spelled a variety of different ways in English). But if you don’t have prior experience with authentic Korean kimchi, then it might not matter to you.
I just never cared for what I could find in jars after I left the DC/NoVA area where there’s a sizeable Korean population, so I decided to make my own and ordered a bag of the ground Korean pepper online. It’s wasn’t that expensive and it’s going to last me quite some time.
As to how hot it is, that is such a judgment call that it’s almost impossible for anyone to answer that question. I will tell you that I start with less gochugaru (half or less?) than called for in any recipe by someone who is Korean, and then add more if it’s not hot enough for me. Try imagining how much that would be if it was a pepper you’re more familiar with like cayenne. That’s a good approach for any spicy cuisine. I do the same with Indian recipes.
The bottom line is that you can always add more, but you can’t take it out after you put it in!
Hi Amy. I find Gochugaru is almost a sweet bell pepper with a small amount of heat. Cayenne, while very sweet in raw form, really can’t be added in its dry form to a level the sweetness stands out without increasing the heat to where that dominates. Gochugaru is sweet as primary profile with a tiny amount of heat. The color is unparalleled. While I might substitute cayenne, be prepared for a different flavor profile. I might add cayenne in addition to Gochugaru to make it hotter. I like HOT.