
This post may contain affiliate links. Please see our disclosure policy.

I love how easy and delicious these peanut butter pumpkin bars are with only 8 ingredients! Vegan, gluten-free, and dairy-free, it’s a healthy Fall dessert without any refined sugars.

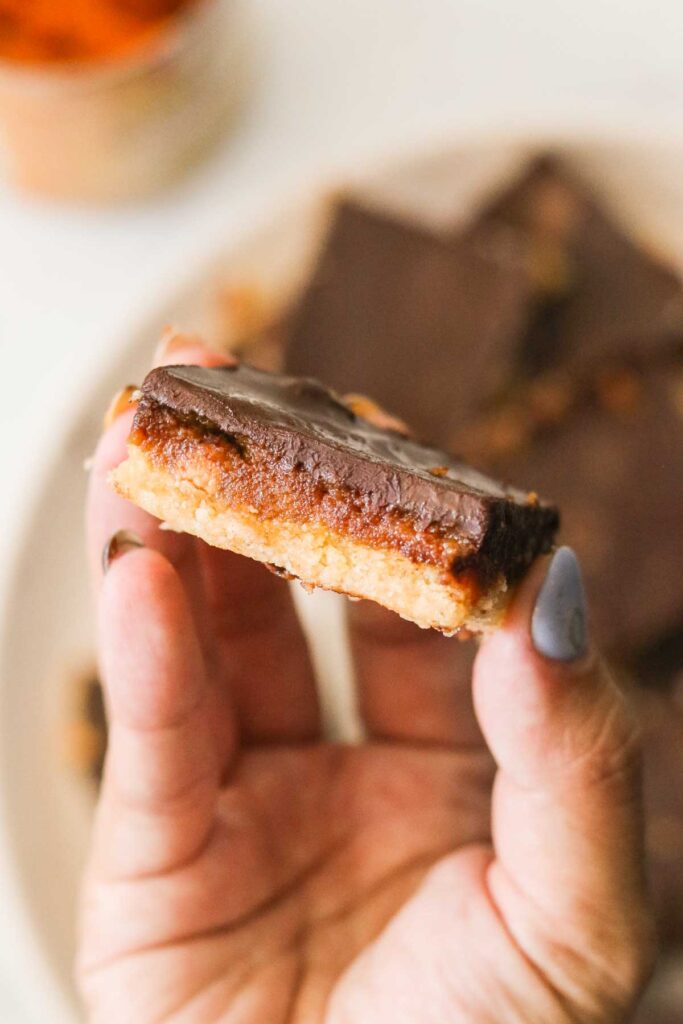
I feel like it’s impossible to go wrong with pumpkin spice, peanut butter, and chocolate. There’s something so addicting and wonderful about this flavor combo, and I can’t get enough of it in the Fall. These peanut butter pumpkin bars are gluten free, vegan, and refined sugar free, but you would never know that they are a healthier alternative to Reese’s peanut butter pumpkin cups once you have a bite!
Watch a Short Video of How to Make These Bars
Gluten Free Peanut Butter Pumpkin Bars Recipe
I love that this easy Fall treat just uses 8 simple ingredients, and they are freezer-friendly as well! You can also keep these in the fridge, but I personally like to freeze them then take them out whenever I get a sweet tooth. Of course, they last way longer in the freezer as well. They really do remind me of those seasonal Reese’s peanut butter cups, but without that artificial flavor taste.
Ingredients
- almond flour: You can either blanched almond flour or almond meal, and they’ll both work great! I haven’t tried with any other type of flour, but oat flour is a good alternative.
- coconut oil: If you aren’t vegan, melted ghee or butter will also work well in this recipe.
- maple syrup
- peanut butter: I used creamy peanut butter, if feel free to use crunchy peanut butter if you like some texture.
- pumpkin puree: Make sure to use pumpkin puree, NOT pumpkin pie filling.
- pumpkin pie spice
- sea salt
- chocolate chips: There are many vegan chocolate chips you can purchase now. I really like this brand.
How to Make Vegan Peanut Butter Pumpkin Bars
- Preheat the oven to 350 degrees F. Line an 8×8 baking dish with parchment paper.
- In a large bowl, add the ingredients for the base crust layer and stir until a dough forms. Press into the parchment lined pan evenly.
- Bake for 12 minutes until golden brown at the edges, then cool for 10 minutes. Turn off the oven.
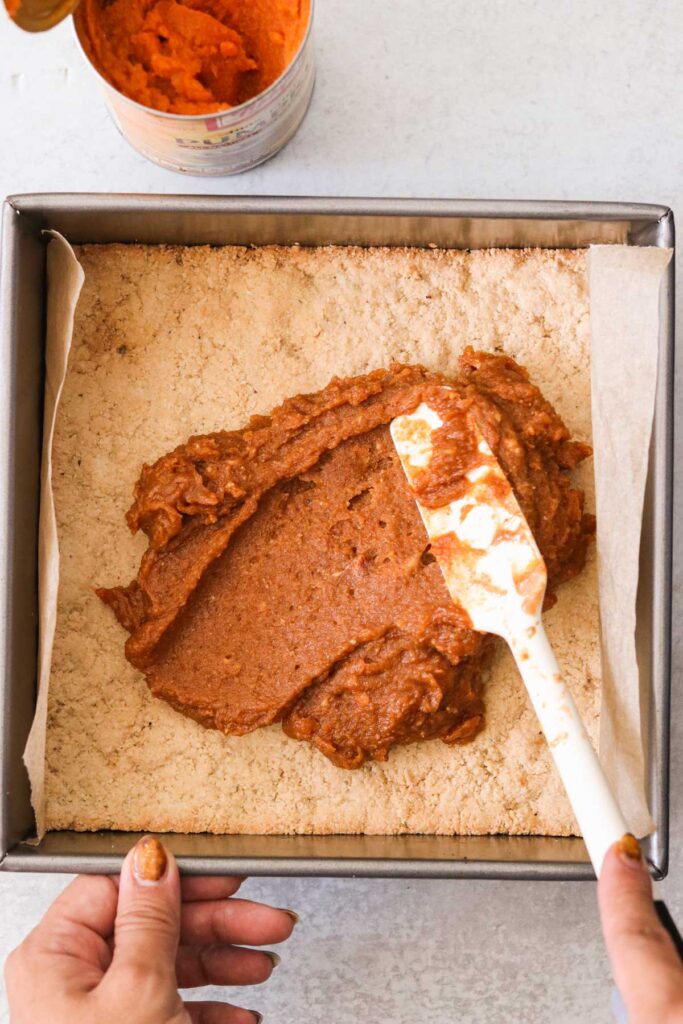
- In a mixing bowl, stir together all ingredients for the peanut butter pumpkin filling until smooth. Pour the mixture over the baked base layer and smooth out the top. Freezer while you make the chocolate layer.
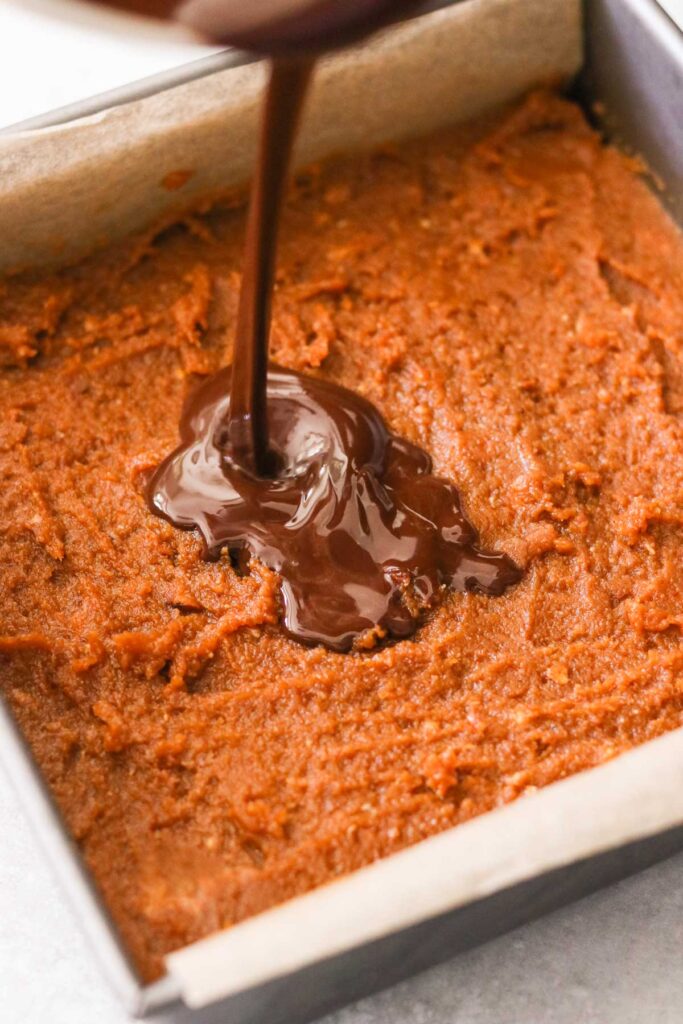
- Combine chocolate chips and coconut oil and melt together in a microwave or a double boiler. Stir together then evenly pour over the peanut butter pumpkin filling layer, tilting the pan to spread evenly.
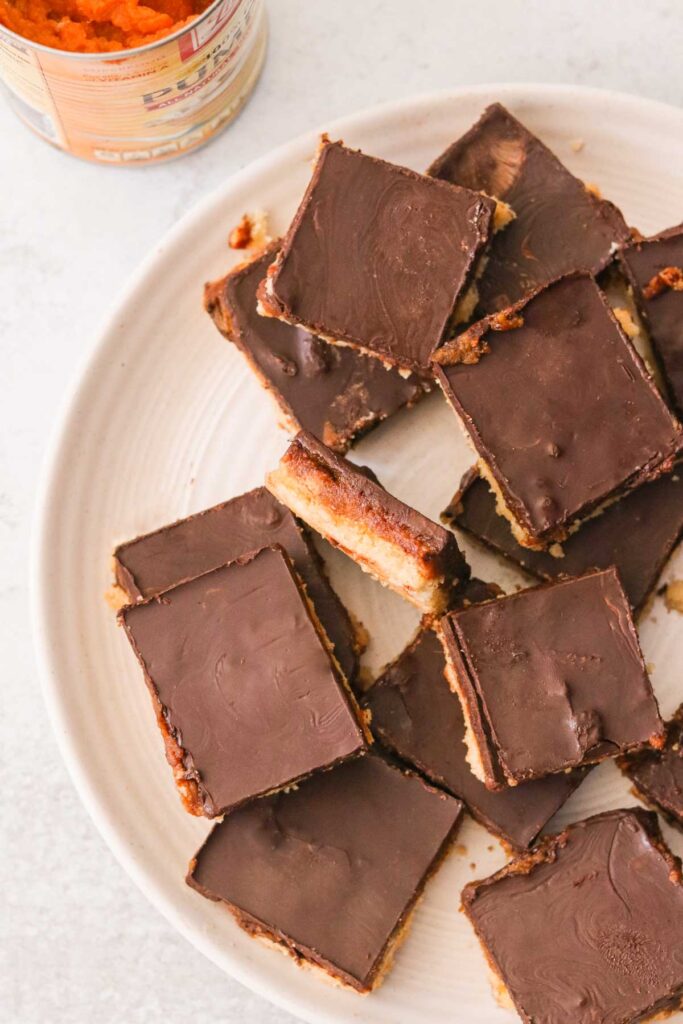
- Freeze for at least 1 hour until set. Slice into 16 squares and enjoy! You can store in the refrigerator or the freezer.
How to Store These Peanut Butter Pumpkin Bars
You can store yummy dessert bars in the fridge on the freezer. Slice, then place in an airtight container. Refrigerate for up to 1 month, or you can freeze for up to 3 months! I recommend thawing for 10-15 minutes before biting into them if you do decide to freeze them.
If you enjoyed this recipe, you might also like…
- Paleo Pumpkin Swirl Brownies (Grain Free, Dairy Free)
- Paleo Reese’s Bars
- No-Bake Chocolate Peanut Butter Bars (Vegan, Gluten Free)
- Homemade Twix Bars Recipe (Paleo, Vegan)
- Marbled Paleo Chocolate Pumpkin Bread

Peanut Butter Pumpkin Bars (Vegan, Gluten Free)
Video
Ingredients
Base Layer
- 1½ cup almond flour
- 3 tbsp coconut oil, melted
- 3 tbsp maple syrup
Peanut Butter Pumpkin Filling
- 2/3 cup peanut butter
- 1/3 cup pumpkin puree
- 3 tbsp maple syrup
- 3 tbsp coconut oil
- 1 tsp pumpkin pie spice
- 1/4 tsp sea salt
Chocolate Layer
- 1 cup chocolate chips, these are vegan
- 2 tbsp coconut oil
Instructions
- Preheat the oven to 350 degrees F, and line an 8×8 baking dish with parchment paper.
- In a mixing bowl, add all ingredients for the base layer and stir until a dough forms. Press into the parchment lined pan evenly.
- Bake for 12 minutes until slightly puffed and golden brown at the edges, then cool for 10 minutes. Turn off the oven.
- In a mixing bowl, stir together all ingredients for the peanut butter pumpkin filling until smooth. Pour over the baked base and smooth out the top with a spatula. Place in the freezer while you make the chocolate layer.
- Combine chocolate chips and coconut oil and melt together in a microwave or a double boiler. Stir together then evenly pour over the peanut butter pumpkin layer, tilting the pan to spread evenly.
- Freeze for at least 1 hour until set. Slice into 16 squares and enjoy! You can store in the refrigerator or the freezer.
Nutrition
Nutrition information is automatically calculated, so should only be used as an approximation.
What Great Grandma Ate / Jean Choi is a participant in the Amazon Services LLC Associates Program, an affiliate advertising program designed to provide a means for sites to earn advertising fees by advertising and linking to Amazon.com.
Regarding other affiliate links and affiliate relationships: In order for me to support my blogging activities, I may receive monetary compensation or other types of remuneration for my endorsement, recommendation, testimonial and/or link to any products or services from this blog. Thank you for your support and understanding.
I love making bars. So much faster than cookies! I didn’t make any adjustments to these and they turned out great.
Teenage son thought they were a bit sweet so cut into smaller squares. He’s not GF but thought they were good. Easy to follow recipe.
Thank you so much for leaving a review! You can definitely reduce the maple syrup a bit next time.
These are delicious, relatively healthy, easy to make, and my kids love them.
Yay! I’m so glad!
Huge hit in our house! And I love that it’s not overly sugary.