This post may contain affiliate links. Please see our disclosure policy.
Tuna onigiri are Japanese rice balls stuffed with tuna, mayo, and sriracha, wrapped in nori, and sprinkled with toasted sesame seeds. A delicious, popular snack!
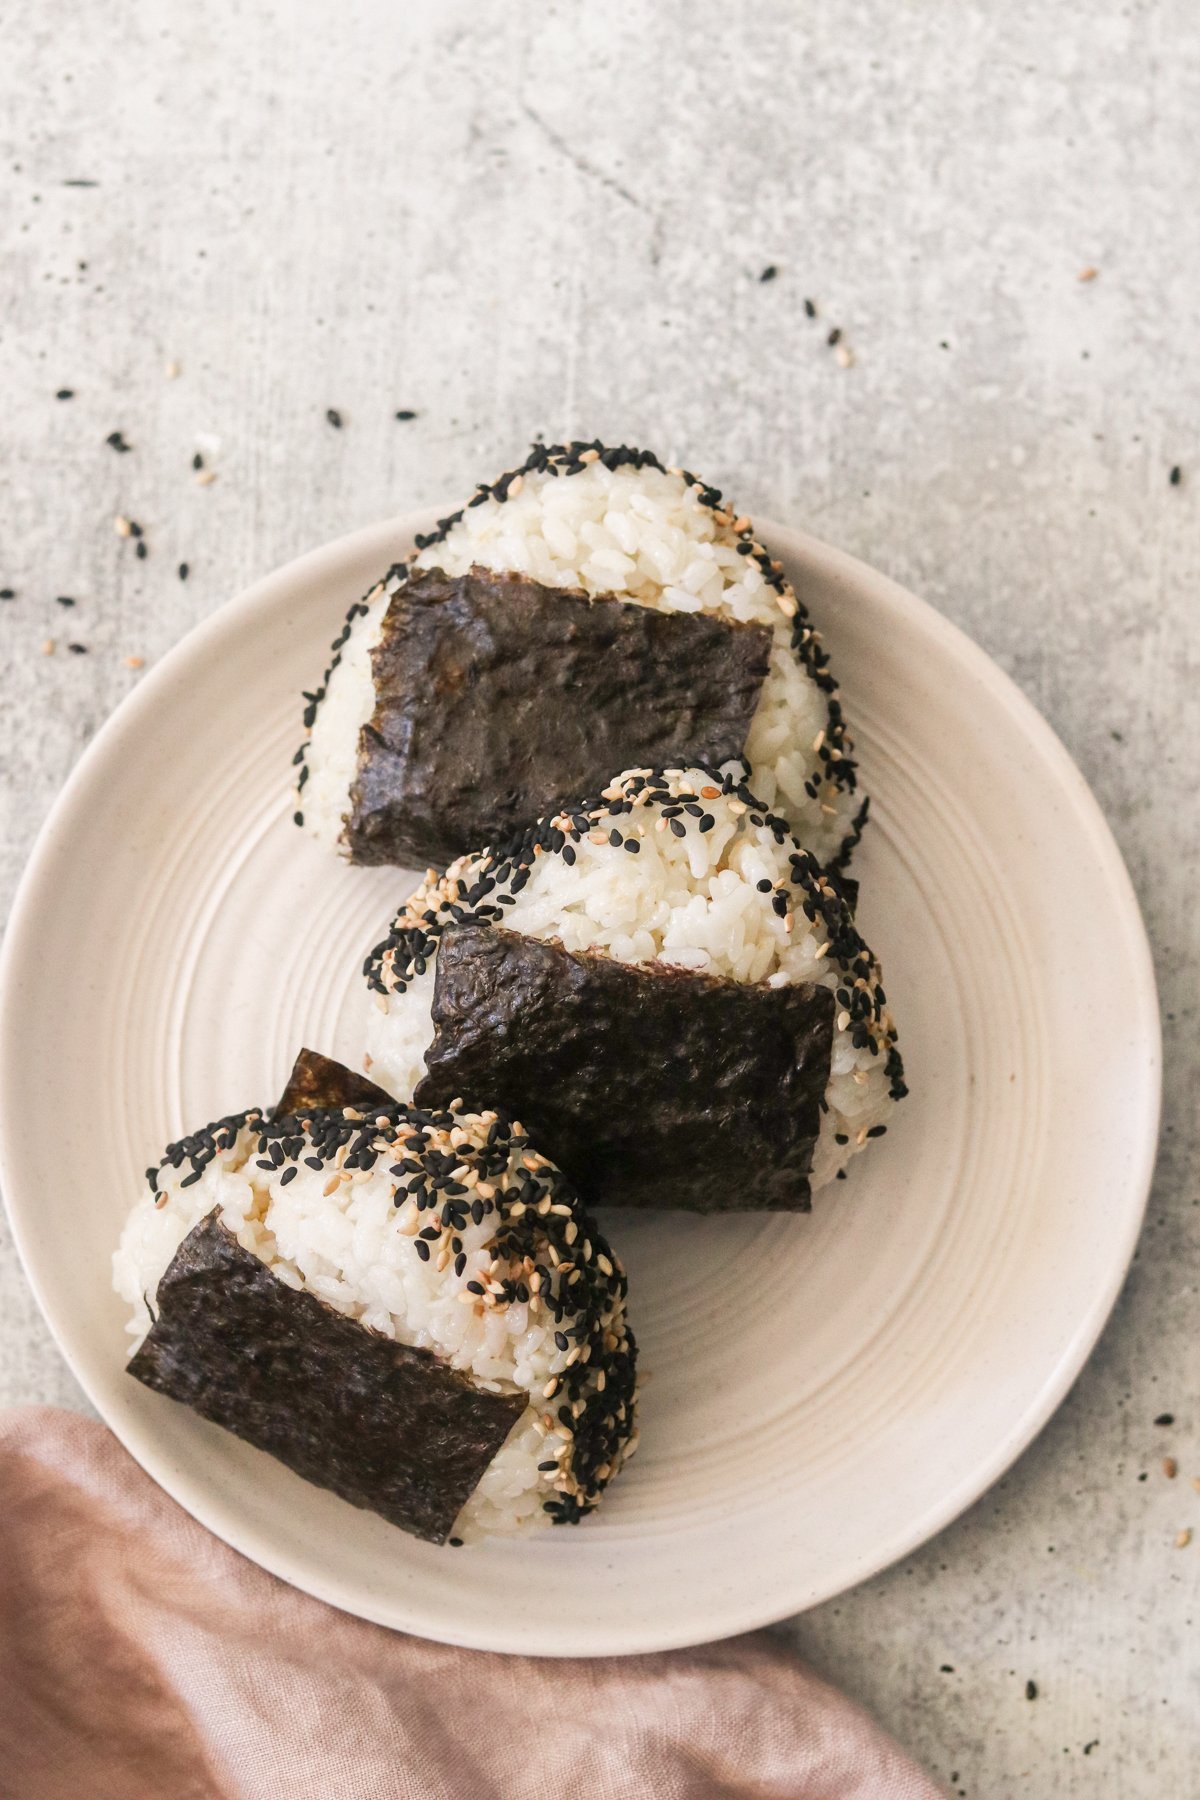
What is Tuna Onigiri?
Tuna onigiri is a popular Japanese dish consisting of seasoned rice balls filled with a tuna-based filling. Onigiri are a type of Japanese rice ball made by shaping cooked rice into a triangular or oval shape, often wrapped in a sheet of nori (seaweed) for easier handling. These rice balls are a convenient and portable snack or meal.
Onigiri is commonly shaped into triangles and wrapped in nori (seaweed) sheets. While they are commonly filled with tuna, they can be filled with salmon, umeboshi (pickled plum), roe, and countless other variations.
What Makes This Recipe Great
It’s been several years since I’ve been to Japan, but I still remember fondly all the amazing food I had there. Even food at the convenience stores was top-notch in quality and flavor.
One of my favorite things I ate on the train ride from Tokyo to Aomori was onigiri – a Japanese rice ball with tuna filling. The concept is so simple but so delicious, and it’s commonly eaten as a meal or a snack on the go or in bento boxes.
Today, we’re making a homemade version of Tuna Mayo Onigiri. And while these delicious snacks are made with simple ingredients, there’s nothing simple about the amazing flavor of this satisfying dish! Make them spicy with added sriracha, or keep them mild- You can’t go wrong!
Watch a Short Video of This Recipe
Ingredient Notes
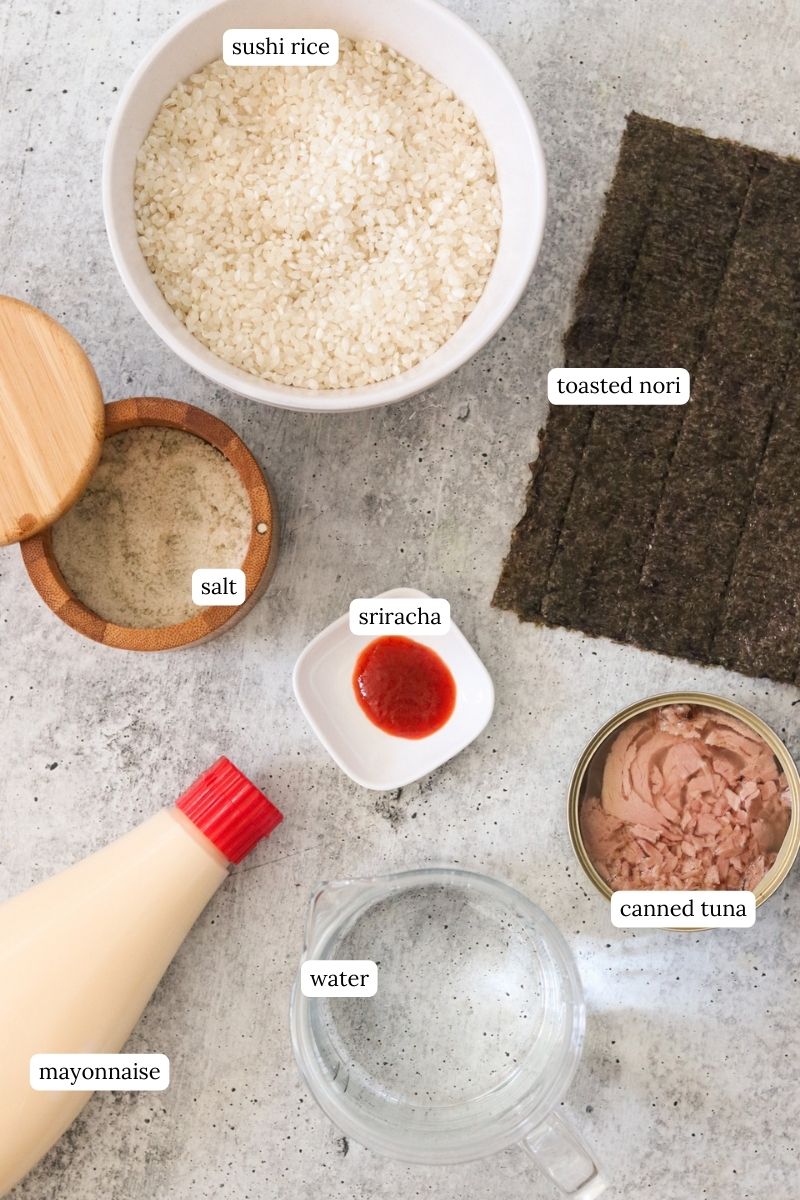
- sushi rice: Sushi rice is short-grain rice, which is round and plump. It has a higher starch content, which gives it the desired stickiness when cooked.
- water
- canned tuna: I prefer to use a can of tuna that is canned in oil (not water). Drain the excess oil before using in this recipe.
- mayonnaise: I highly recommend you use Japanese mayo or Kewpie mayo for that traditional flavor.
- sriracha sauce: I like spicy tuna onigiri, so I add a bit of sriracha to the tuna filling, but you can omit it for a non-spicy version.
- toasted nori
- salt: When making sushi, the rice is seasoned with rice vinegar, but when making onigiri, you only season it with a bit of salt during the shaping process.
- toasted black and/or white sesame seeds: optional for garnish.
Step-by-Step Instructions

- Place rice in a fine-mesh sieve or a rice washing bowl, and rinse well under cold running water until the water runs mostly clear. Drain well.
- Add rice and water to a rice cooker and cook according to the manufacturer’s instructions. You can also cook in the Instant Pot: Add water and rice to the Instant Pot liner and close the lid, ensuring the release valve is in the sealing position. Cook on high pressure for 6 minutes. Once it beeps to a finish, naturally release pressure for 10 minutes. Open the lid.
- Fluff the rice, then transfer it to a large bowl. Cover with a kitchen towel to keep it from drying out while you prepare the filling.
- Make your tuna mixture by combining the drained tuna, mayo, and sriracha (if using) in a bowl and use a fork to mash and stir together.
- Use kitchen shears to cut each nori sheet lengthwise into 3 equal strips.
- Prepare a bowl of water and a small bowl of salt. Sprinkle a thin layer of sesame seeds on a small plate if using.
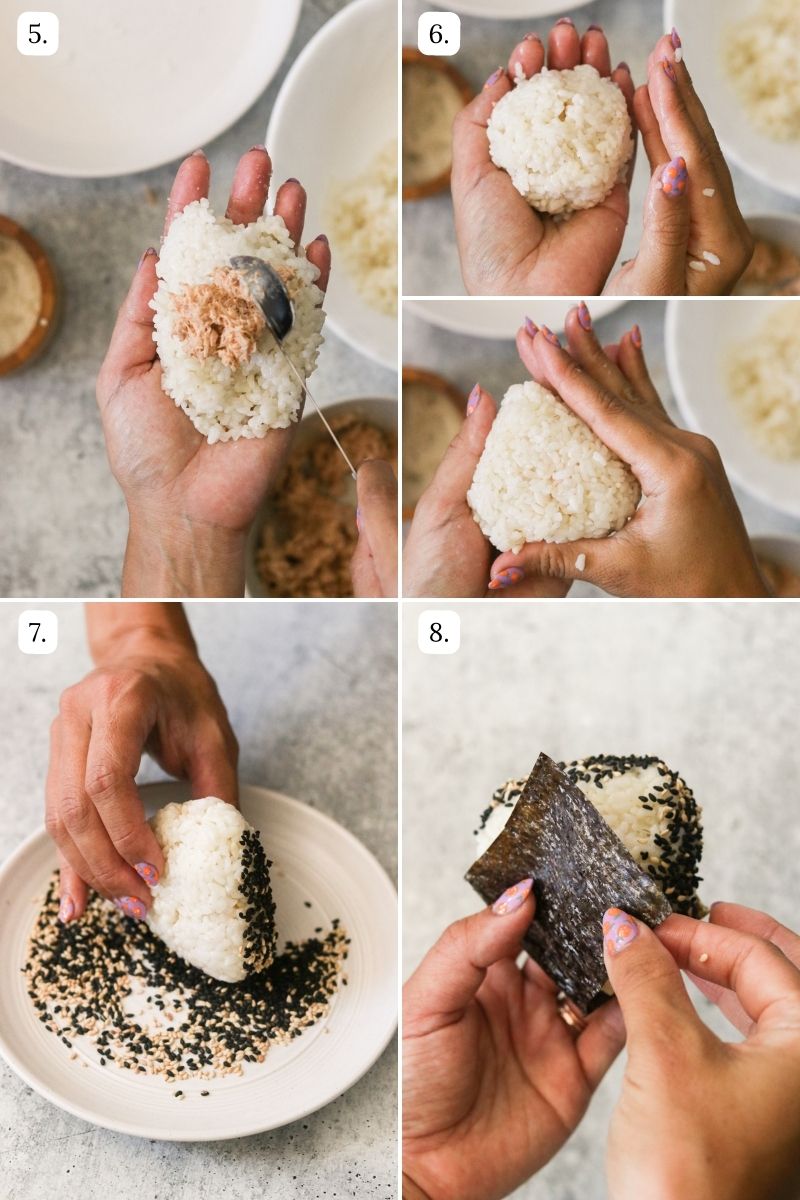
- Once the rice is cool enough to handle (but still warm), assemble the onigiri: Wet your hands lightly with the bowl of water to keep the rice from sticking. Take a pinch of salt and rub it around the palms of your hands. Grab about 1/2 cup of rice with your hands, then flatten it out into a circle. Add 1½ tbsp of the tuna mayo filling to the center, then cover with the surrounding rice to make a flattened ball – you can add a bit more rice to cover the tuna if needed. Use your fingers to shape the ball into a flattened triangle.
- Dip 2 flat edges of the triangle in sesame seeds. Take a nori sheet to wrap the onigiri on the side without sesame seeds.
- Repeat with the rest of the rice and filling until you have about 6 onigiri. Enjoy immediately.

Expert Tips
- For a spicy tuna filling, use more or less sriracha to taste. For a mild version, omit the sriracha.
Serving Tips
- Serve immediately, garnished with toasted sesame seeds.
- Some also like to garnish with chopped green onions and soy sauce for dipping. Feel free to garnish as desired.
Storage Tips
- I recommend eating onigiri the day that it’s made and do not refrigerate. The rice will harden in the fridge.

Recipe FAQs
Onigiri with tuna is a filling snack that is healthier than many alternatives. However, it should still be eaten in moderation. While this delicious snack is high in protein, it’s also high in carbs and some fat from the mayonnaise. It’s a perfectly healthy on-the-go meal when consumed in moderation.
There are SO many filling options for Onigiri. These include grilled salmon, teriyaki chicken, tempura shrimp or veggies, sautéed spinach or mushrooms, avocado slices, pickled radish, kimchi, scrambled eggs, sesame seeds, cream cheese, grilled eel, miso-glazed vegetables, leftover cooked meats or stir-fries, soft or melting cheese, and even furikake, a Japanese seasoning blend. These fillings provide a range of flavors and textures, allowing you to customize your onigiri to suit your taste preferences.
While the filling is made with tuna, the difference between this recipe and yaki onigiri is that the yaki version is pan-fried after assembly.
More Delicious Snack Recipes
If you make this recipe, please leave me a star rating and comment below! I love to hear your thoughts and feedback. Follow me on social media Instagram, Facebook, and Pinterest for even more delicious recipes!
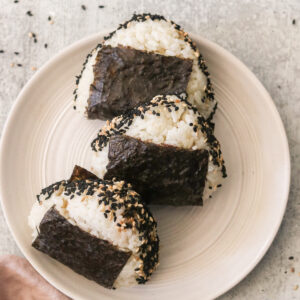
Tuna Onigiri Recipe (with Spicy Option!)
Video
Ingredients
- 1½ cup sushi rice
- 1⅔ cup water
- 5 oz can of tuna, in oil, drained
- 2½ tbsp mayonnaise, preferably Kewpie mayo
- 1 tsp sriracha sauce, optional, for spicy onigiri
- 2 sheets toasted nori
- Salt
- Optional: toasted black and/or white sesame seeds, for garnish
Instructions
- Place rice in a fine-mesh sieve or a rice washing bowl, and rinse well under cold running water until the water runs mostly clear. Drain well.
- Add rice and water in a rice cooker and cook according to manufacturer's instructions. You can also cook in the Instant Pot: Add water and rice to the Instant Pot liner and close the lid, making sure the release valve is in the sealing position. Cook on high pressure for 6 minutes. Once it beeps to a finish, naturally release pressure for 10 minutes. Open the lid.
- Fluff the rice then transfer to a large bowl. Cover with a kitchen towel to keep it from drying out while you prepare the filling.
- Combine drained tuna, mayo, and sriracha (if using) in a bowl and use a fork to mash and stir together.
- Use kitchen shears to cut each nori sheet lengthwise into 3 equal strips.
- Prepare a bowl of water and a small bowl of salt. Sprinkle a thin layer of sesame seeds on a small plate, if using.
- Once the rice is cool enough to handle (but still warm), assemble the onigiri: Wet your hands lightly with the bowl of water to keep the rice from sticking. Take a pinch of salt and rub around the palms of your hands. Grab about 1/2 cup of rice with your hands, then flatten it out into circle. Add 1½ tbsp of the tuna filling to the center, then cover with the surrounding rice to make a flattened ball – you can add a bit more rice to cover the tuna, if needed. Use your fingers to shape the ball into a flattened triangle.
- Dip 2 flat edges of the triangle in sesame seeds. Take a nori sheet to wrap the onigiri on the side without sesame seeds.
- Repeat with the rest of the rice and filling, until you have about 6 onigiri. Enjoy immediately.
Notes
Expert Tips
- For a spicy tuna filling, use more or less sriracha to taste. For a mild version, omit the sriracha.
Serving Tips
- Serve immediately, garnished with toasted sesame seeds.
- Some also like to garnish with chopped green onions and soy sauce for dipping. Feel free to garnish as desired.
Storage Tips
- I recommend eating onigiri the day that it’s made and do not refrigerate. The rice will harden in the fridge.
Nutrition
Nutrition information is automatically calculated, so should only be used as an approximation.
What Great Grandma Ate / Jean Choi is a participant in the Amazon Services LLC Associates Program, an affiliate advertising program designed to provide a means for sites to earn advertising fees by advertising and linking to Amazon.com.
Regarding other affiliate links and affiliate relationships: In order for me to support my blogging activities, I may receive monetary compensation or other types of remuneration for my endorsement, recommendation, testimonial and/or link to any products or services from this blog. Thank you for your support and understanding.


